
An Unlined Jacket for Comfort and Style (one of two)
by Kathryn Brenne
To see a list of all sewing tutorials, click here!
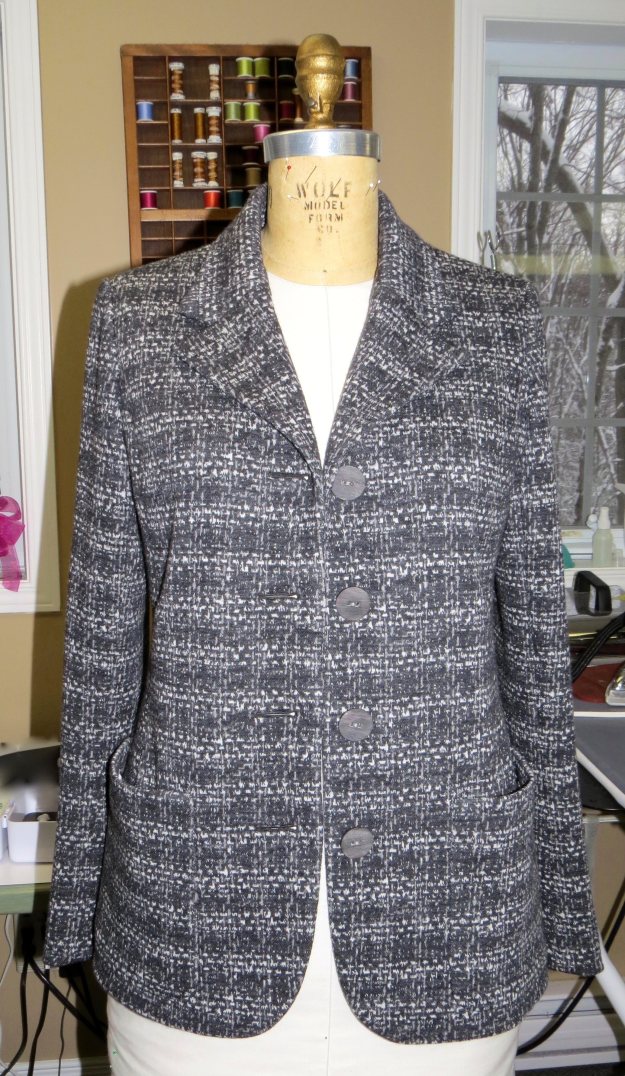
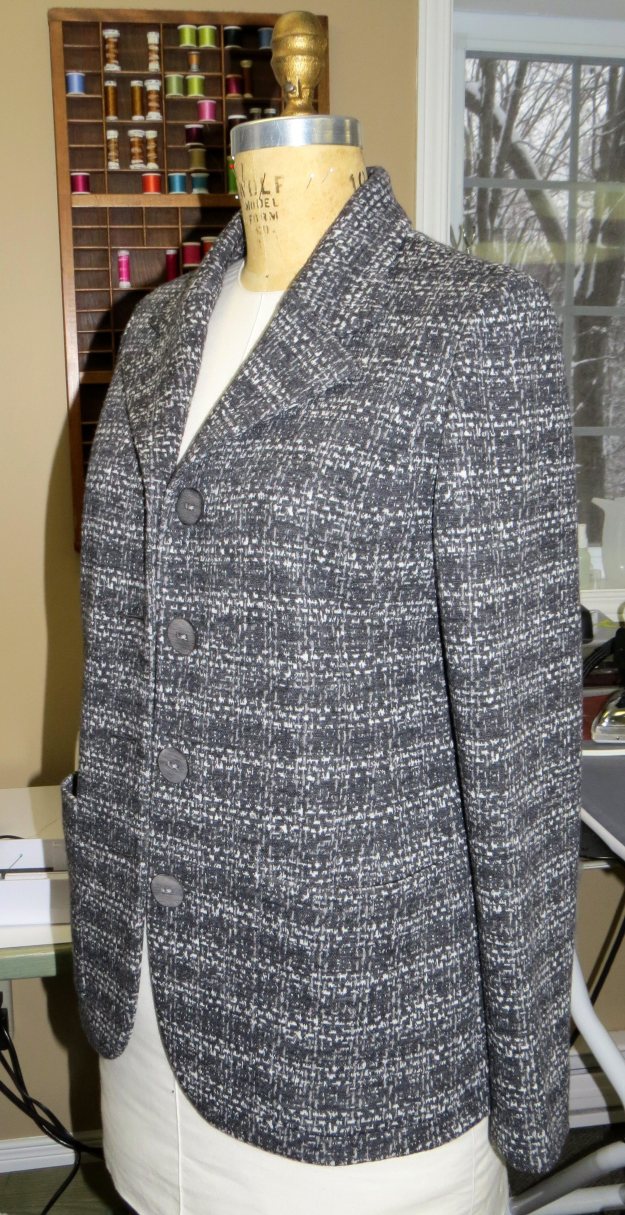
 A few years ago I made a dressy unlined knit jacket for my husband, which he absolutely loves. I’ve been wanting to make myself a similar jacket for travel and more everyday use since it does not wrinkle. While this type of jacket can be made to suit any occasion, with its small amount of stretch it is super comfortable to wear, just like a favorite sweater!
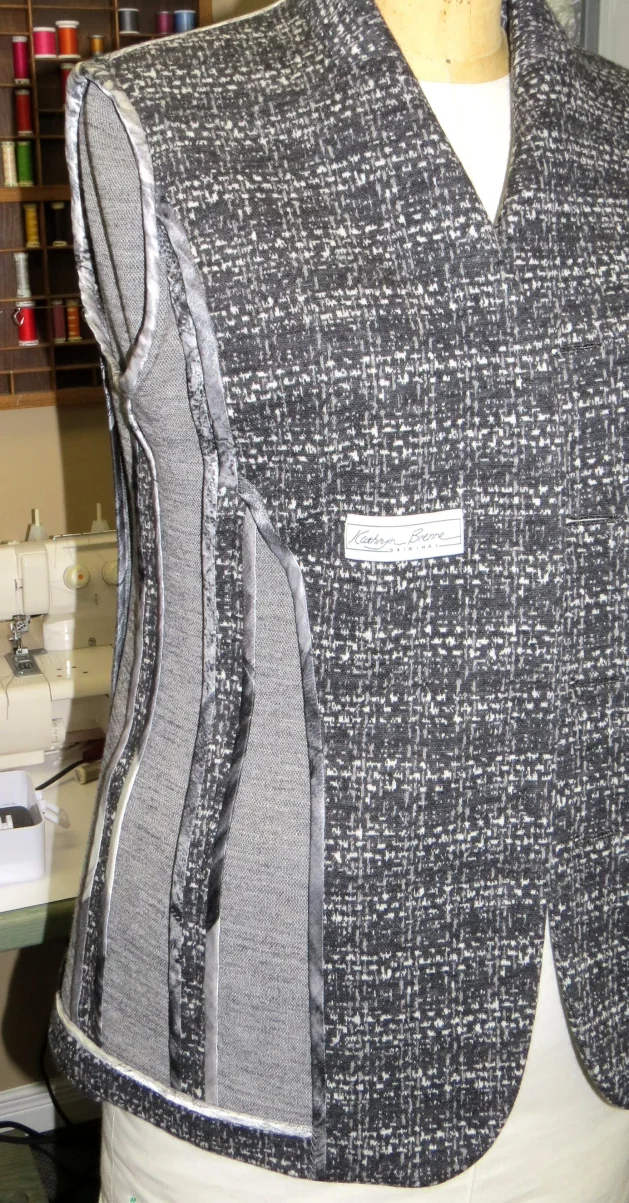
To encourage those who are intimidated by the thought of tailoring a jacket, I have taken out most of the traditional tailoring techniques for this project and substituted them with fusible interfacings. By binding all of the seams with silk charmeuse, you’ll have a jacket that is as pretty on the inside as it is on the outside!
Fabric
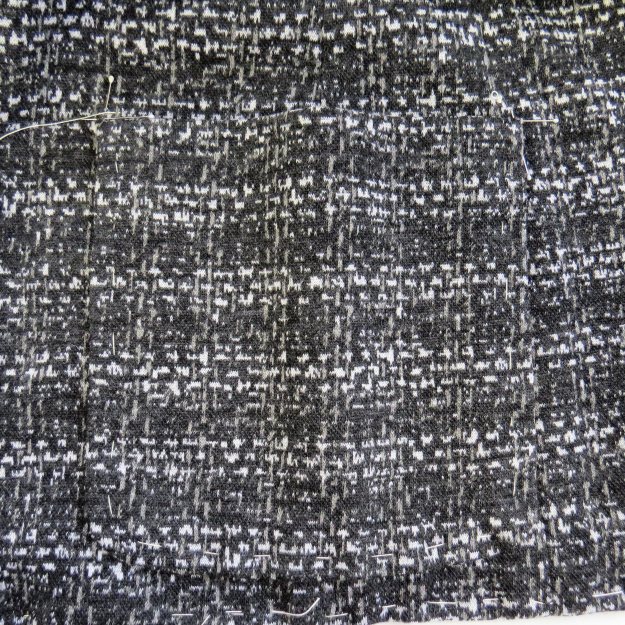
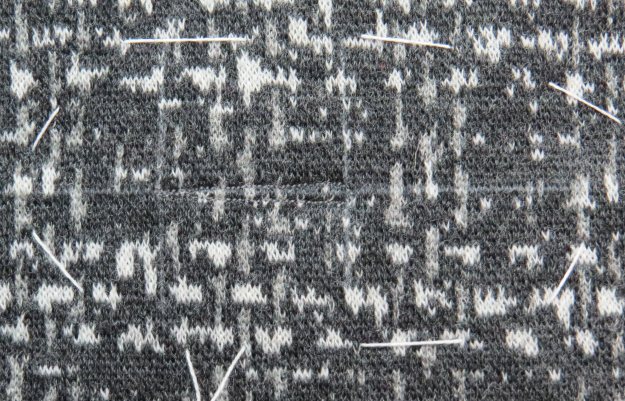
One of the features that really makes this jacket work is the choice of fabric. I looked for a stable sweater knit fabric, and the fact that this one resembled a tweedy woven made it particularly suitable. A knit fabric with a bit of texture or a heathery look could also work well. These techniques could easily be applied to woven fabrics with or without stretch, but it is a definite plus for this style of jacket that the fabric has some stretch, making it very comfortable to wear.
I used silk charmeuse to bind all of the raw edges. This could be an opportunity to use a bright, fun print to jazz up the inside of a jacket.
Two types of interfacing were used; a lightweight woven fusible and an all bias knit. The woven fusible could be substituted with a fusible weft insertion depending upon the weight of your fabric. The woven fusible is used to give firm support where needed, whereas the all bias knit is used for soft support, to prevent seams from showing through and to give hems a soft roll. The weft insertion could be used on knits that require more support. Try test-fusing swatches and see if you like the results.
Pattern
Look for a traditional jacket pattern. Vogue 9099, Butterick 6103, 5926, Kwik Sew 3715 or Simplicity 1421 would all be suitable. To keep the casual jacket feel, I omitted the sleeve vents, center back vent, lining pieces, back neck facing from my pattern, and converted pockets to patch pockets. Use the front facing pattern piece and if necessary add the following alterations. Widen the front facing to come across the full width of the front shoulder and down the front armhole. I extended it 7” below the armhole, following the princess seam line and then curving back to a 4” wide facing down the front of the jacket. Having a wider upper facing helps to fill in the hollow area above the bust.

The Under Collar was cut on the bias with a center back seam and the Upper Collar was cut in one piece on the cross grain.
Preshrinking
To preshrink a fabric with some wool content place a damp cloth over the fabric, area by area, and then press using steam. The steam is forced through the fabric, which preshrinks it. Allow the fabric to dry completely.
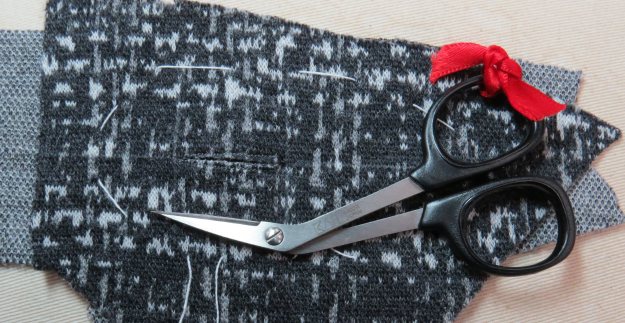
Layout and Cutting
There was a definite pattern to my fabric that required matching. The pattern pieces were cut in a single layer to facilitate matching.

To learn more about matching visit the Tips for Matching section of the Tweed & Bouclé: The Classic Cardigan Jacket article.
Interfacing
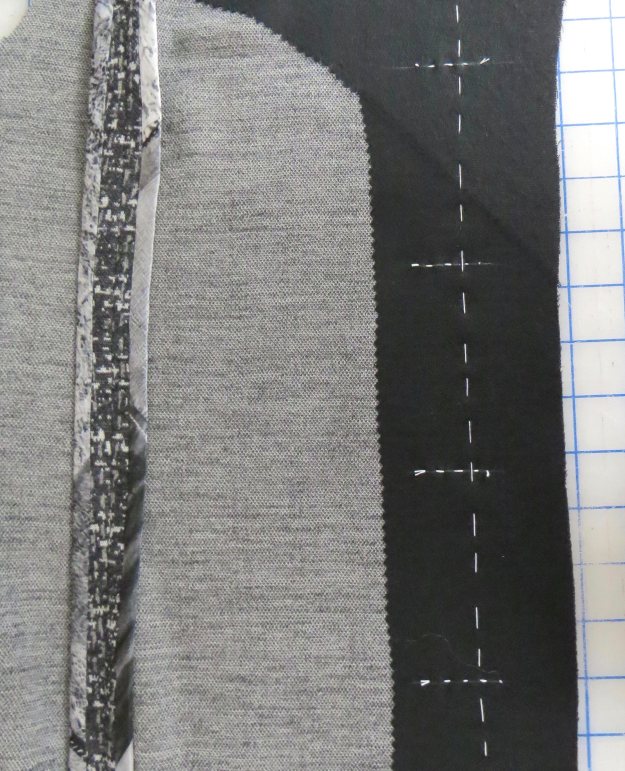
I used a combination of two interfacings. The hem allowances were interfaced with strips of 2” all bias knit interfacing cut on the crosswise grain. The interior edge was pinked to prevent it from showing through as a line on the right side of the fabric.
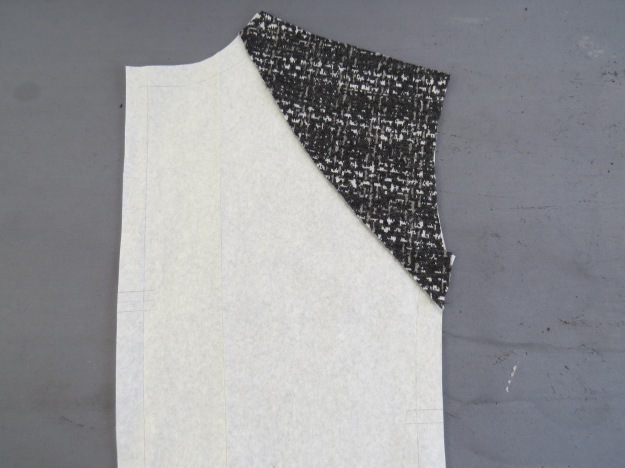
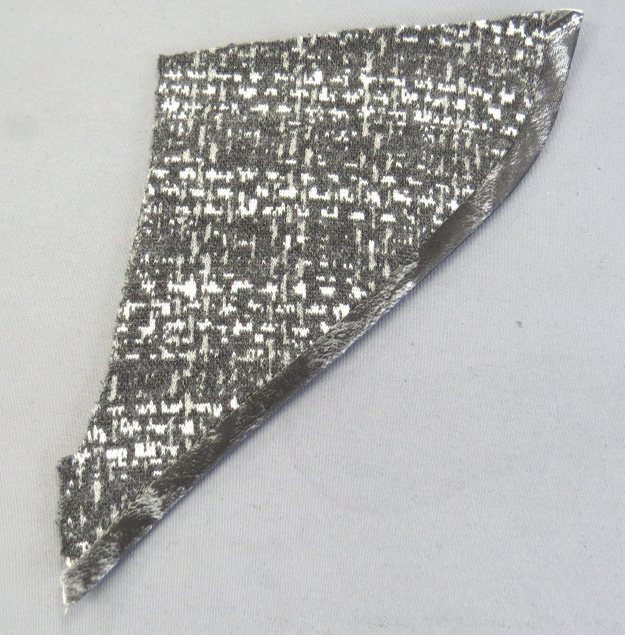
The front Facing and both collars were fused with all bias interfacing. I used the front Facing pattern piece as a guide to cut a second piece of all bias fusible interfacing for the Fronts. This piece of interfacing was 4 1/2” wide and went from the front straight up to the shoulder. The inside edge of it was pinked and then fused to the Fronts. I cut a triangular shaped piece of woven interfacing that consisted of the lapel and upper Front area above the bust. This was used as a chest shield to give extra support to the hollow area above the bust. Pink the inside edge and then fuse it to the first layer of all bias interfacing.

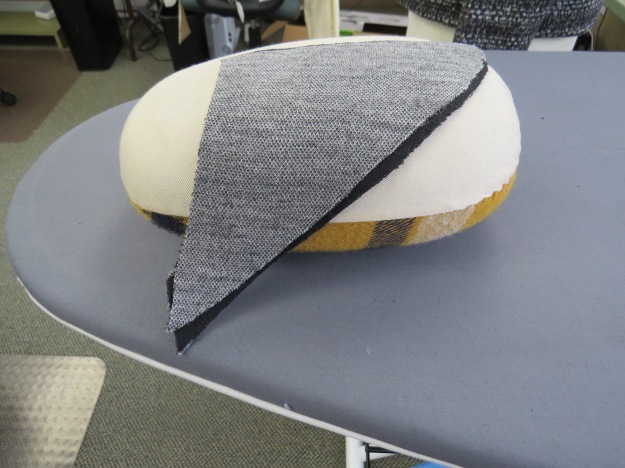
A second layer of woven fusible for the stand of the Under Collar was fused to the all bias knit interfaced collar sections. The grain line for the Collar Stand was placed on the lengthwise grain of the interfacing. The Collar Stand should end at the roll line.
Proper fusing can take some time do. In order to get a good fuse, warm up the fabric by pressing. Position the interfacing, taking care that none of it extends beyond the fabric. Fusing should be done with a lift and press motion rather than a gliding motion. Test fuse a swatch first to determine how long the iron should be held in one spot in order to obtain a good fuse. Usually 15 seconds will do it. Lift the iron and reposition for another 15 seconds. Once the entire piece has been fused, turn the fabric over to the right side and do the same thing again, place a lightweight press cloth over the fabric to prevent it from marking. As the right side of the fabric is pressed the glue is drawn into the fabric.
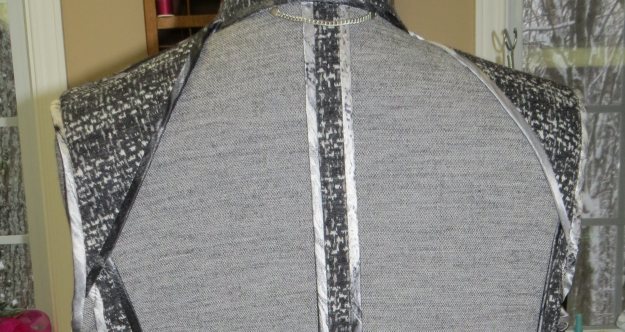
Binding and Seams
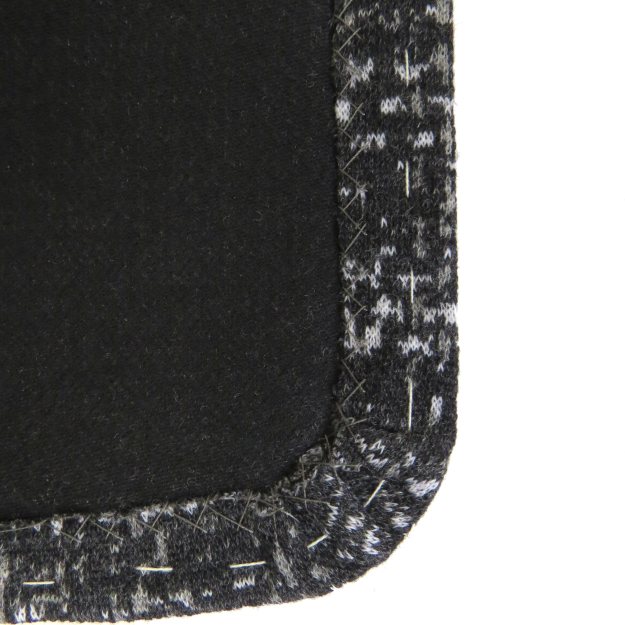
To finish the seam allowances of the unlined jacket I used binding, which I cut from a silk charmeuse print. The strips were cut on the true bias. It is important that it is the true bias. If the strips are a bit off of true bias they will twist off grain as you work with them. For my print I cut the strips 2” wide and ran them through a 3/4” bias tape maker. The width of the strips will depend on the weight of your fabric. Always try a sample first, which is double the width of the finished strip. Try a 1 1/2” strip for a 3/4” bias tape maker and then go from there. If the strip is too narrow it will stretch out as you pull it through the bias tape maker and not have enough of a seam allowance. If the strip is too wide it will twist and buckle down the center.
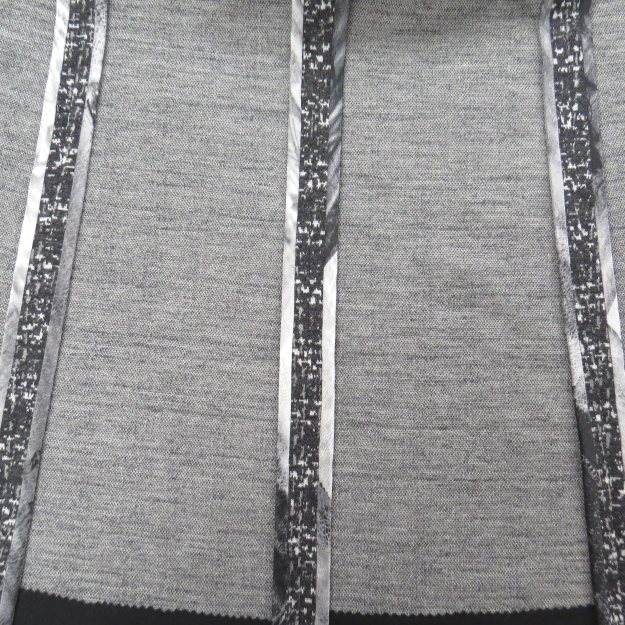
All vertical seams, the shoulder seams, the edges of the Front Facing, the armholes and hems should all be bound. For best results, begin by binding all pieces, other than the armholes and hems, before assembling the jacket.
Use a bias tape maker tool to make the bias. To get the strip started, cut the end straight across creating a point. Place the strip into the tool and use a pin to pull the tip through the folder. With the iron held close to the tip of the tool press the strip as you pull the tool along. If the tool gets too far ahead of the iron the fabric will start to lose its folded edges. It takes some practice to get it just right!
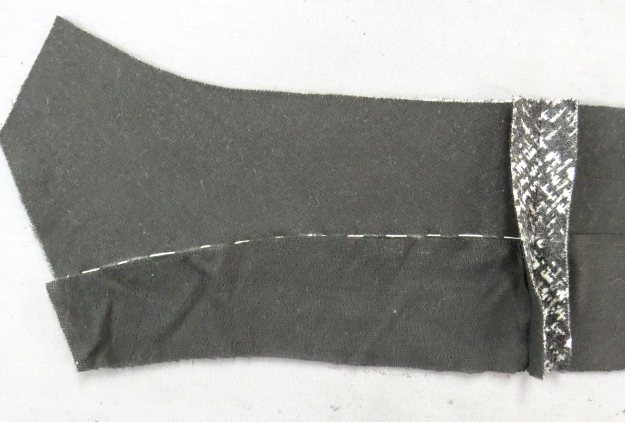
To attach binding to fabric, open out one of the folds of the binding and pin it to the fabric.
Use a 1/4” foot to sew the binding to the fabric.
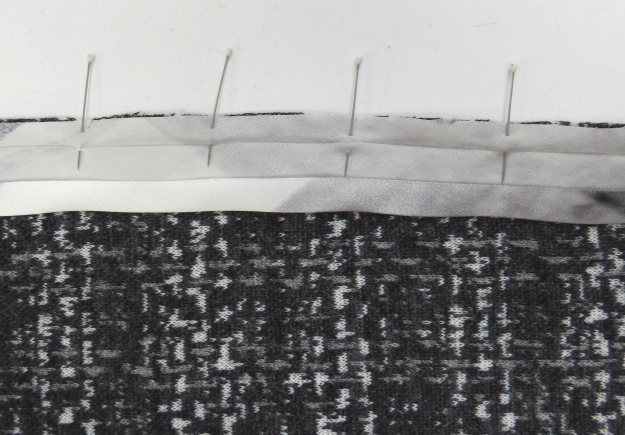
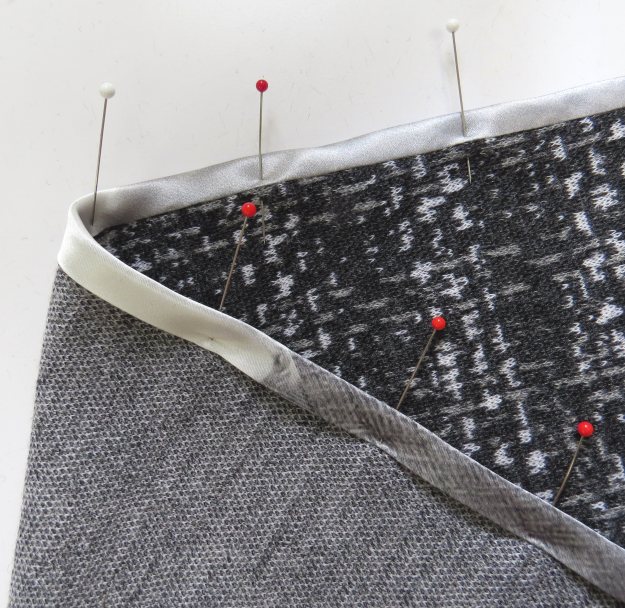
 Press the sewn edge flat being careful not to flatten the opposite fold of the binding. Wrap the binding over the edge. Pin in place.
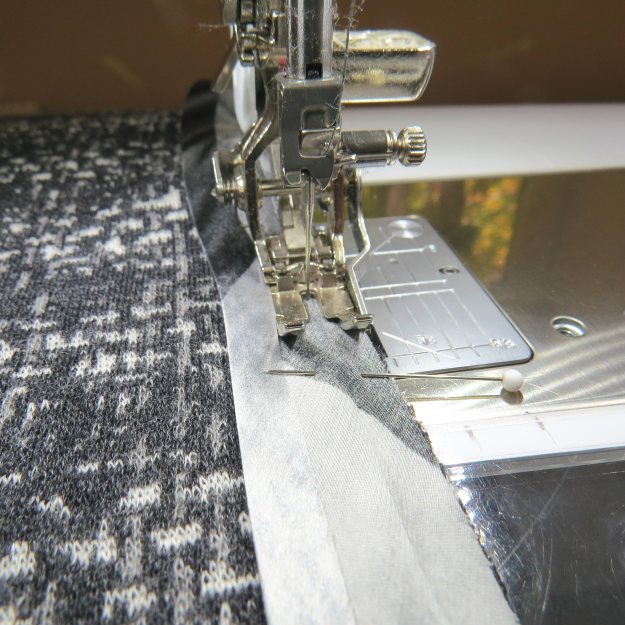
 The binding should cover the row of stitching on the wrong side of the fabric. Stitch in the well of the seam (also known as “stitching in the ditch”).

Lightly press. Once the vertical seams have been bound, the jacket can be assembled. Chalk the stitching line onto the fabric. Baste the seams together. 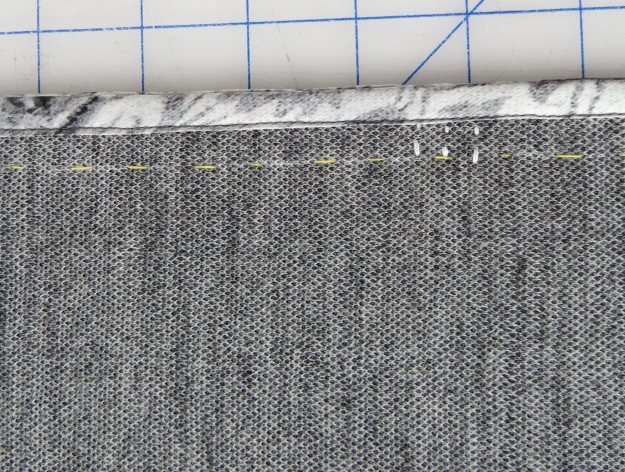
Stitch. Press the seam flat and then open.
Patch Pockets
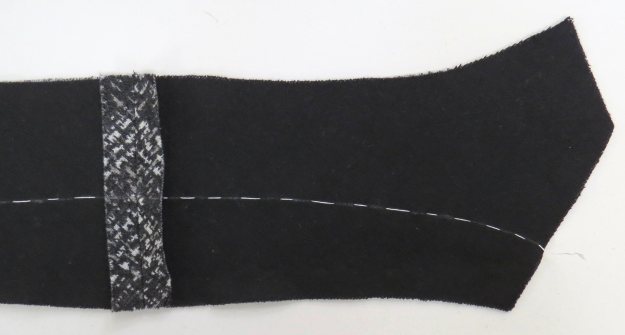
1. Make a pattern piece for your pocket shape and size, and also cut a template of the finished pocket shape out of thing cardboard. Cut a piece of pocket fabric in a square that is larger than the pocket pattern piece. Interface with all bias interfacing. Thread trace the outline of the pocket pattern piece onto the square of fabric. Also thread trace the fold line along the upper edge of the pocket.
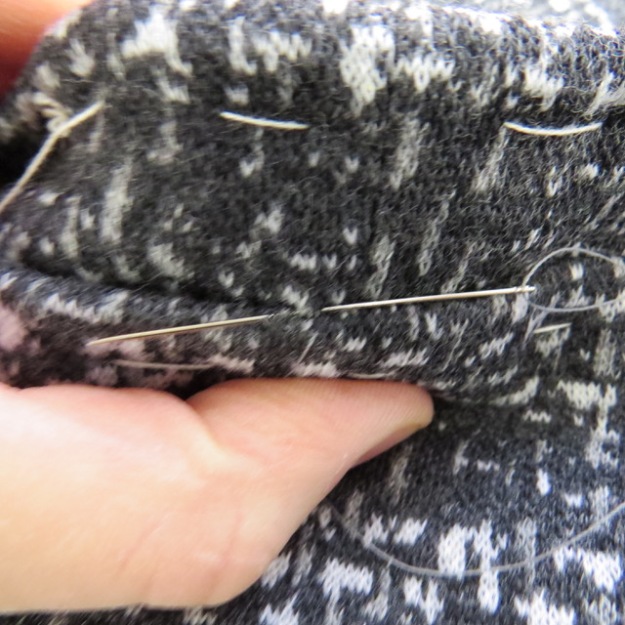
2. Cut a stay tape from the selvedge of the silk charmeuse. Pin the stay tape to the thread traced fold line.
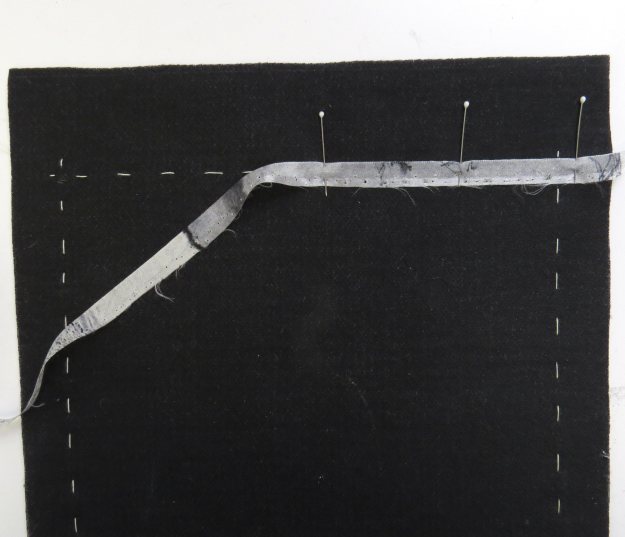
Stab stitch the stay tape to the foldline of the pocket.


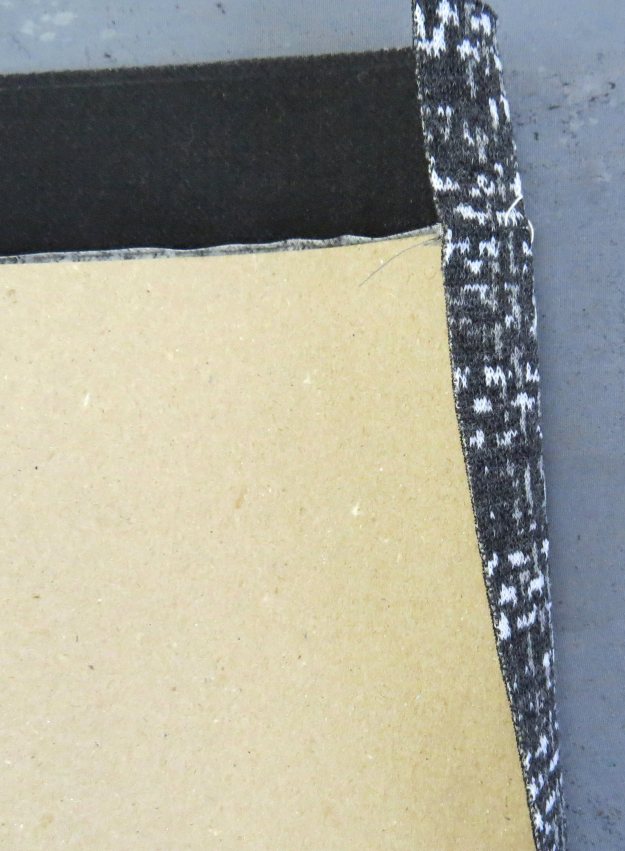
3. Position your cardboard template on the wrong side of fabric. Press the edges of the fabric over the template.
Trim the edges of the pocket down to 1/2”. Catch stitch the seam allowances to the interfacing using a loose tension to prevent the edge from showing through on the right side of the fabric.
Hem stitch the pocket facing to the pocket. Do not catch stitch the facing in
place as it tends to pull slightly and show through on the right side of the fabric.
4. Cut the pocket lining from silk charmeuse using the pocket pattern piece. Use the cardboard template to lightly press the seam allowances in. You do not want a hard press on the edges of the pocket lining. Pin the lining to the finished pocket allowing for a small amount of fullness. Baste to hold. Slip stitch the lining to the pocket.
5. Baste the pocket to the jacket.
Fell stitch the pocket to the garment working the stitch slightly to the underside of the seam allowance. The pockets should look like they are slightly floating and not hammered down or pulling on the jacket.
Collar and Front Facing
1. Sew the center back seam of the Under Collar.
2. Thread trace the roll line onto the Under Collar.
Fuse the Collar Stand interfacing to each side of the Under Collar separately. 

3. Chalk the 5/8” stitching line onto the corners of the Under Collar.
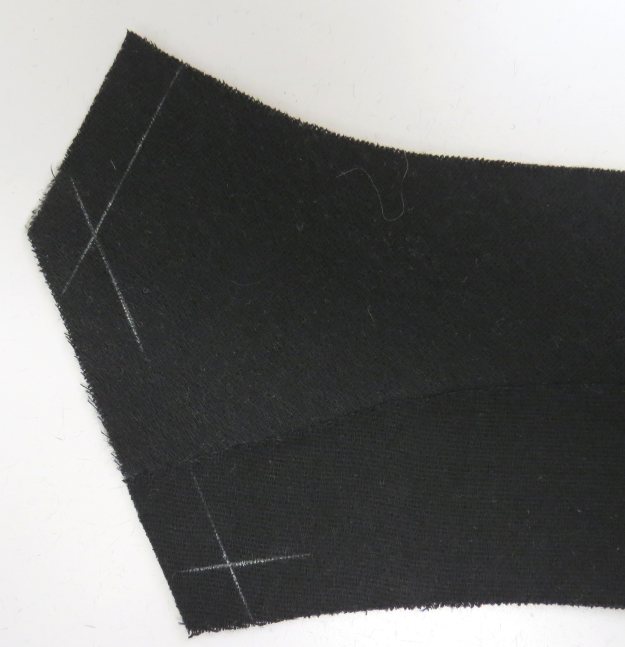
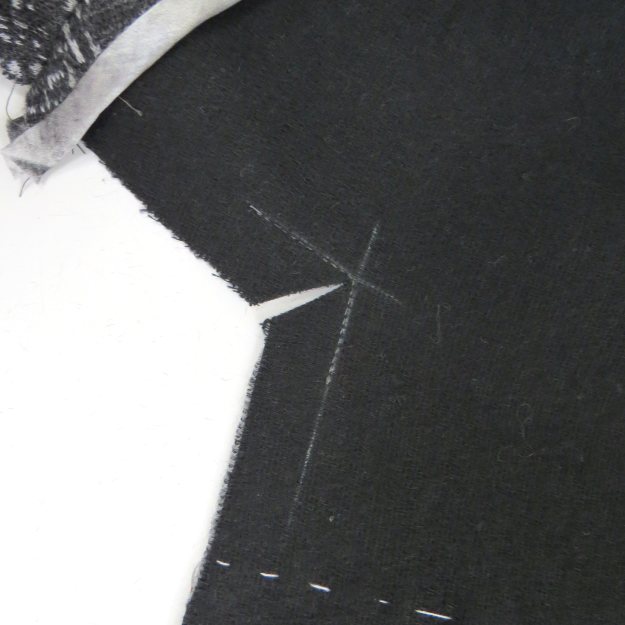
4. Chalk the stitching line on the inner corner of the lapel of the jacket Fronts. Staystitch. Clip into the corner.
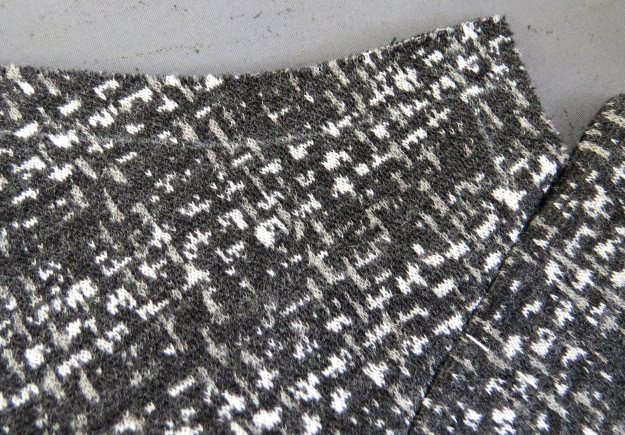
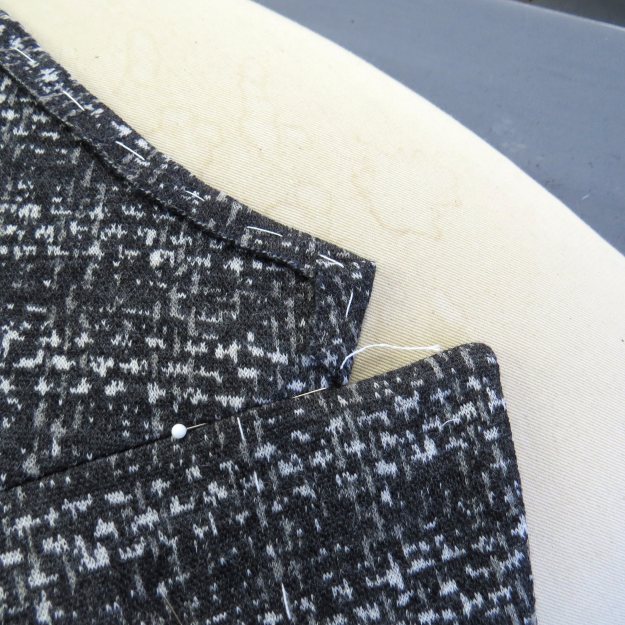
5. Attach the Under Collar to the jacket along the neck edge turning the corner into each lapel. The short seam, which attaches the collar to the lapel is known as the gorge. Stitching should end 5/8” in from the end of the gorge.
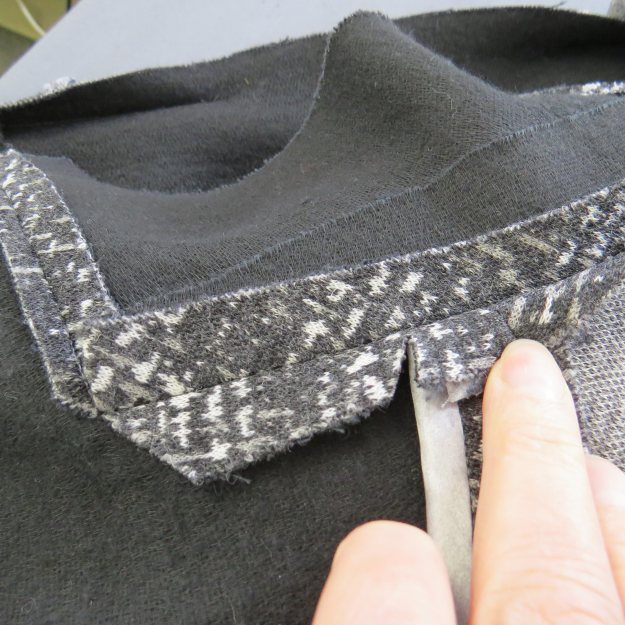
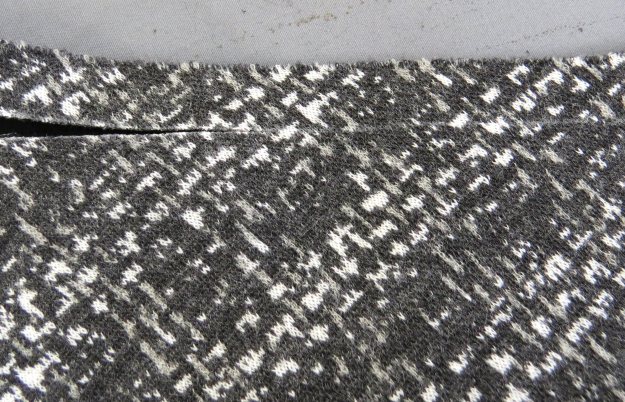
6. Press the seam flat and then open. Trim the seam allowance along the gorge down to 1/4”.

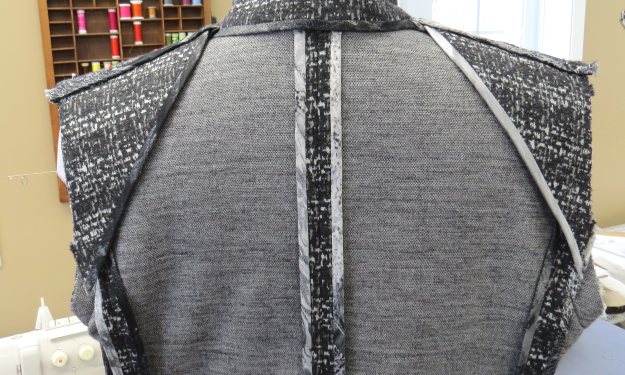
Clip the seam allowance just back of the shoulder seam on an angle.
Press the back neck seam allowance from clip to clip towards the Under Collar.
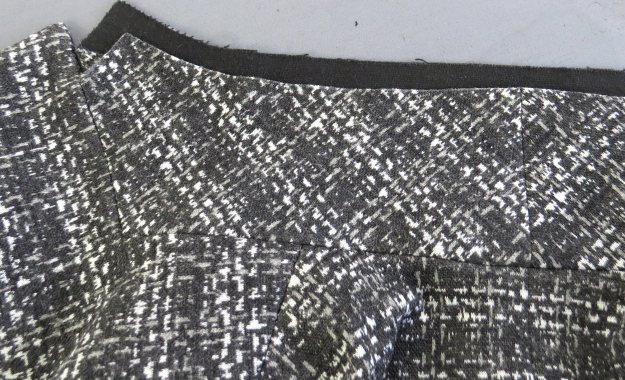
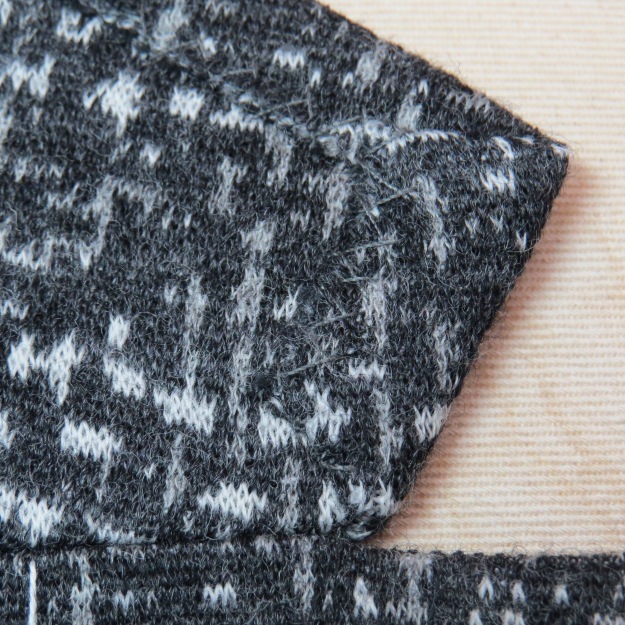
7. Chalk the 5/8” seam allowance on the outer three edges of the Under Collar. Trim away.

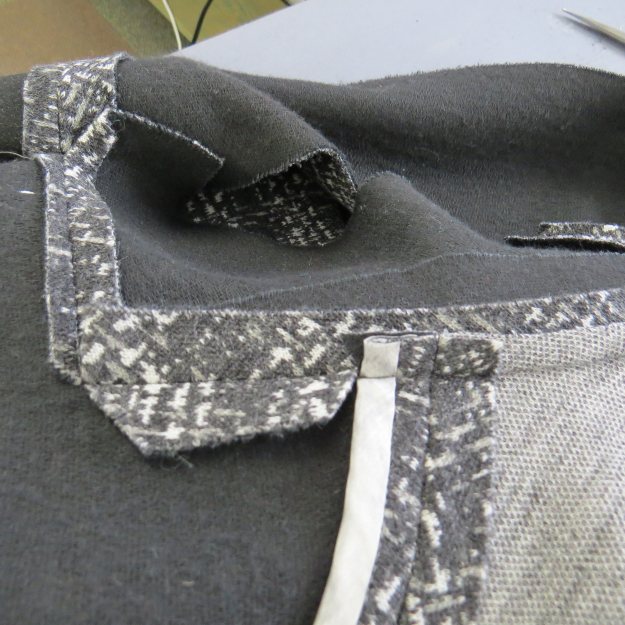
8. Attach the Upper Collar to the Front Facing. Bind the neck edge of the Upper Collar. I did not remove any seam allowance as I found the 5/8” seam allowance was taken up in the roll of the collar. Join the Front Facing to the garment. Press the seam allowance flat and then open. Grade the seam allowance along the front edge of jacket so that the public side is the longest. This will mean the Front Facing is trimmed shorter below the roll of the lapel while the jacket seam allowance is trimmed shortest around the lapel. Press front edges of the jacket. Use a wooden board and clapper to get the edges nice and flat.
9. Pin the gorge of the jacket to the gorge of the Front Facing and Upper Collar. The seam allowance of the Upper Collar will extend beyond the trimmed Under Collar.
Wrap the seam allowance of the Upper Collar around the Under Collar.
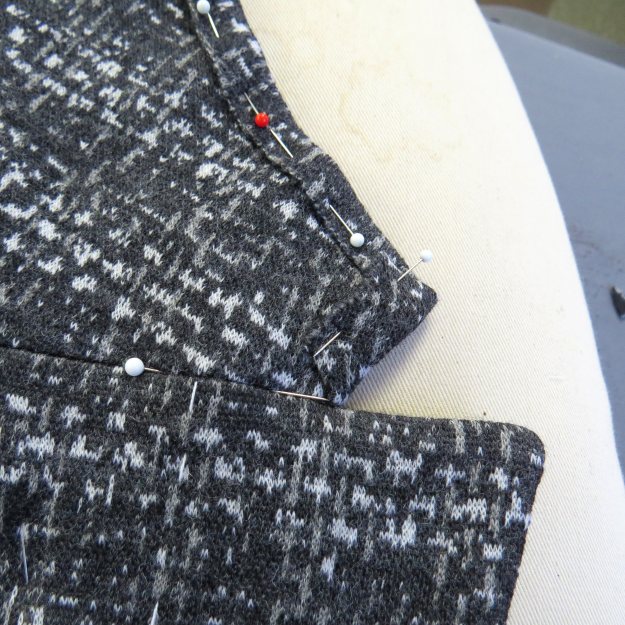
Baste.
Use a very small catch stitch to sew the edge of the Upper Collar to the Under Collar.
10. Try the jacket on or place it on a dress stand. Pin just to the underside of the roll line along the lapel edge. Roll the Front Facing away and loosely catch stitch the Front Facing to the interfacing of the Fronts.

11. Hem stitch the Collars together along the neck edge.
Sleeves
1. Put two rows of gathering threads in the top of the sleeve cap. Pull up gathering threads and pin the sleeve into the armhole. Adjust gathers as needed. Remove sleeve from armhole.
2. Press and steam the gathers slightly to shrink out excess fullness. This is easy to do in a knit fabric. Use a mitt pressing aid inserted into the sleeve cap to steam the sleeve cap.


3. Working on a dress stand pin the sleeve into the armhole.

Check to see how the sleeve is hanging and adjust if needed. This is an opportunity to check how the sleeve matches the plaid of the garment.


Machine stitch sleeve into the armhole. Trim seam allowance down to 1/2”.
Shoulder Pads
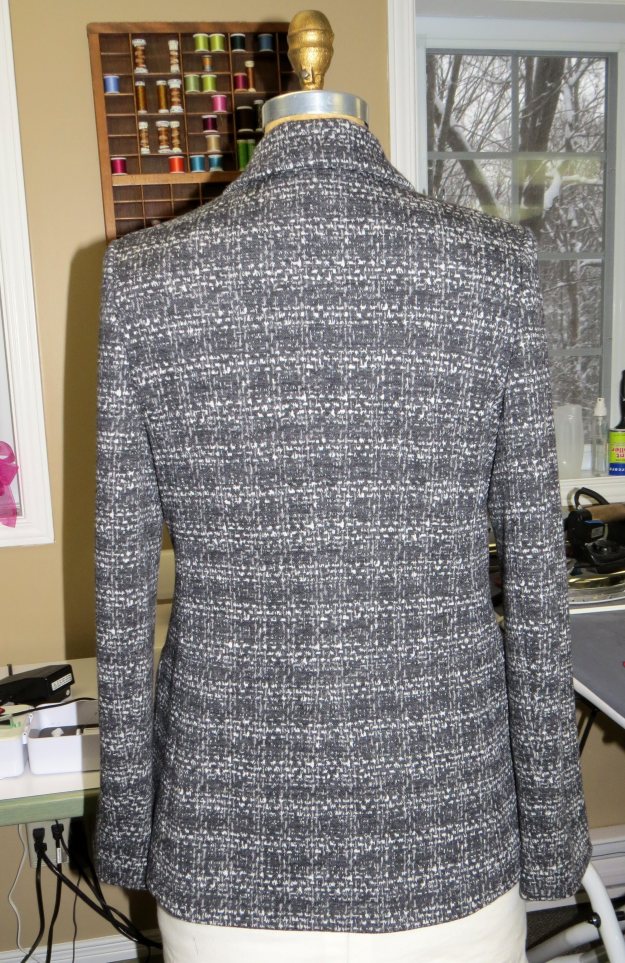
I found the back of the jacket needed a small lift in the shoulder area. I created my own shoulder pad using the paper pattern. I drafted a shoulder pad pattern from the Back pattern piece.
This technique worked well and in the future the shoulder pad could be drafted onto the Front Facing pattern piece at the shoulder and cut as one.
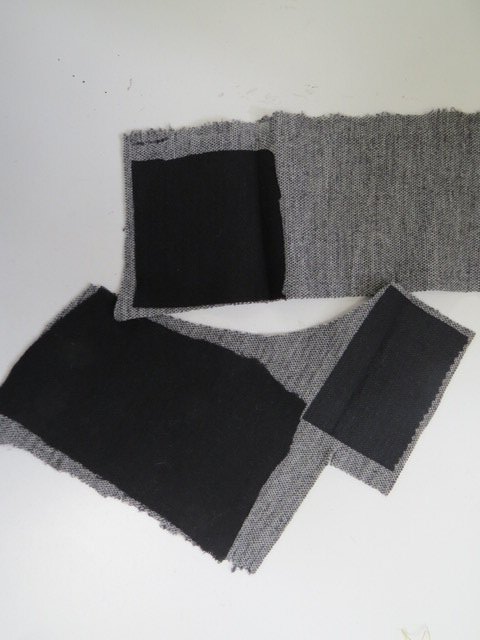
To make the shoulder pads:
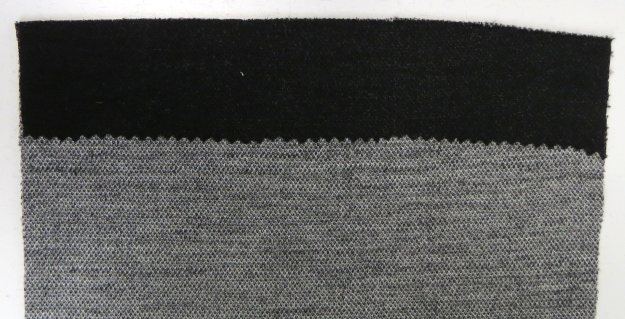
1. Cut 4 pieces of fabric. The shoulder pads are two layers thick. The inside layer is approximately 1/4” shorter than the outer edge to prevent a ridge from showing through on the outside of the jacket.
2. Fuse the two larger pieces of fabric with a woven fusible interfacing. Fuse ‘Steam a Seam Lite’ to the smaller pieces of fabric.
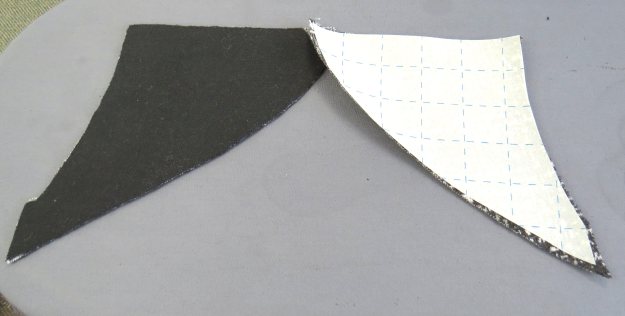
3. Working over a tailor’s ham fuse the two layers together.
Press over the ham to build in a curved shape.
4. Bind the lower edge of the pad.
5. Insert the pad under the shoulder seam of the Front Facing (this is where in the future the pad could be cut as one with the Front Facing.) Slipstich the pad to the edge of the bound shoulder seam.
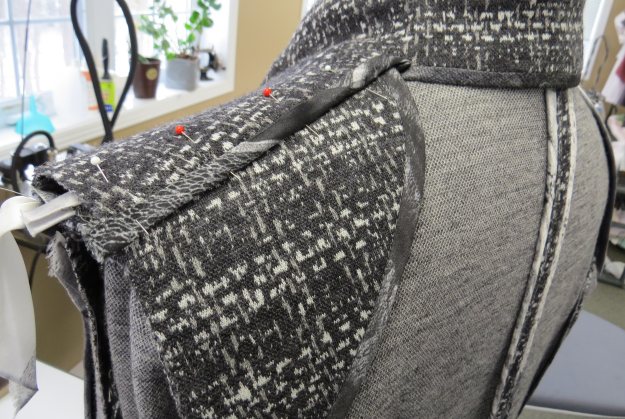
Armhole Binding
To finish the armhole of the jacket, all of the edges including the shoulder pad were bound together. This created quite a thick seam allowance so I made wider (1″) binding for the armhole. Sew the binding to the armhole. Wrap the binding around the seam allowance. The binding may seem a little too wide where there are only two layers of seam allowance in the underarm area. In this case fold the wrong side of the binding under a little more to match the width on the rest of the armhole. Slip stitch the binding to the seam allowance to finish.
Hems and Finishing
Trim the hem allowance at the bottom of the jacket to an even width of 1 1/2”. I left the sleeve hem allowances slightly wider at 2” so that more fabric is seen when the arm is lifted. Bind the hem allowances. Baste the hem in place and hem stitch.
Handworked Buttonholes
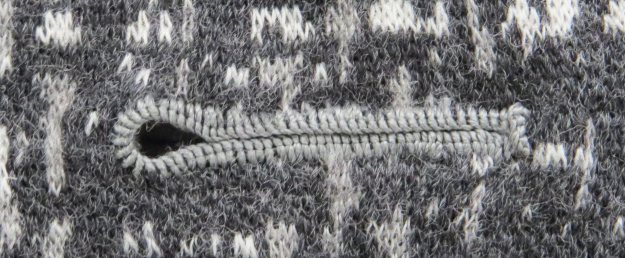
I finished the jacket with handworked keyhole buttonholes using silk buttonhole thread. For more information on making handworked buttonholes click here.
1. The center front and buttonhole placement were traced onto the Front of the jacket after it had been fused.
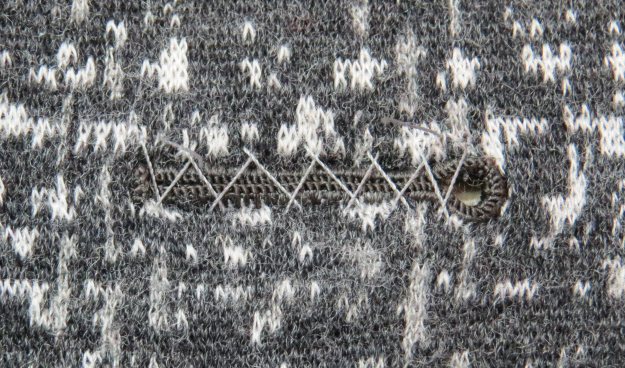
2. Once the jacket is complete baste around each buttonhole area to hold the Front Facing in place. Using a small machine stitch length of 1.5mm stitch a teardrop shape for the buttonhole.
3. Using a pair of sharp scissors cut down the center of the buttonhole.
4. Use a hole punch to punch a small hole in the keyhole end of the buttonhole. The rounded end sits toward the front edge of the jacket. Use gimp to strand the buttonhole.
Work a buttonhole stitch over the cut edges keeping stitches evenly spaced and an even depth from the cut edge. Fan stitches around the rounded end. Work a bartack across the end. Make 5 buttonhole stitches over the bartack to finish.
5. Catch stitch the buttonhole closed. Damp press. Use an awl to shape the rounded end of the buttonhole.
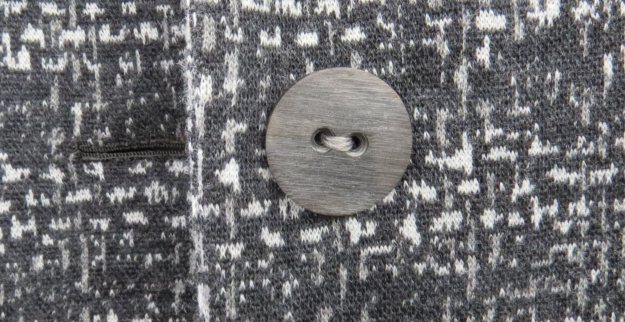
The jacket closes with natural horn buttons.


I love reading Kathryn’s tutorials, but I do have one suggestion. I usually travel in a suit, it is versatile, polished and has pockets. However I like pockets with a positive closing, either a zipper or a button flap, so nothing can slip out and get lost.
LikeLiked by 3 people
One of our upcoming tutorials is on pockets of all types! You can certainly put any type of pocket you would like on a jacket.
LikeLiked by 1 person
Pingback: Inspiration No. 13: A Luxurious Silk Tee | emmaonesock.com
I always learn so much from Ms. Brenne’s detailed instructions and remarkable photography. Thank you for these great tutorials!
LikeLiked by 1 person
Good lesson on how to stay integral to couture techniques: basting, stiches such as diagonal basting, fell stitches etc., use of quality fabric (knit, charmeuse) etc., while still achieving a modern classy look. Thank you, Kathryn!
LikeLiked by 1 person
Another wonderful, creative and “inspirational” tutorial. Don’t ever stop!
LikeLiked by 1 person
Absolutely amazing in every way!
LikeLiked by 1 person
Pingback: Inspiration No. 10 (Part II), Stretch Denim Ponte Trousers | emmaonesock.com