
A Luxurious Silk Tee
by Kathryn Brenne
To see a list of all sewing tutorials, click here!
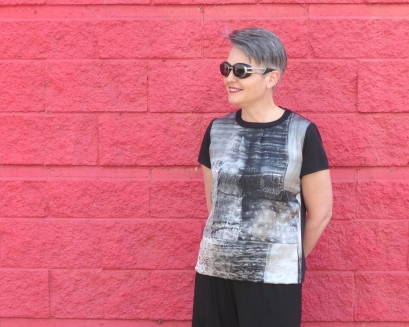
Kathryn modeling her luxurious tee! Scroll down to the bottom of the article for more views.
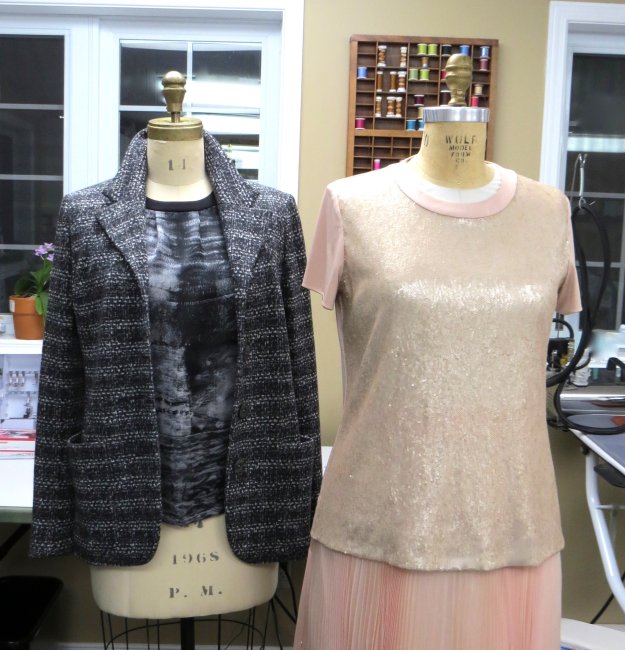
After completing the Unlined Jacket inspiration article I had a nice piece of woven silk print left over that I had used to make the bias binding for the jacket seam finish. There was enough fabric to cut the front of a top and since I loved the print, I had an idea to combine the woven silk print with 100% silk jersey to make a luxurious, couture T-shirt. The result feels wonderful on, and is the perfect garment to wear underneath the unlined jacket!
I loved the design so much that I made a second one using a blush-toned stretch sequin fabric (a remnant from a designer) with blush silk jersey, to go with a pleated chiffon skirt that I made for my recent teaching trip to Paris and London. Since the sequin fabric had stretch, there was no need for the pleats in this version. Before we get started on the tutorial, here are some photos from the Paris streets!


Design
 For the T-shirt I wanted the garment to look harmonious from every angle. By cutting the Back, Sleeves and Neckband out of the silk jersey and the Front out of the woven silk I was able to achieve this, since the neckband and sleeves brought an element from the Back to the Front of the garment.
Silk jersey can be tricky to sew, and it is particularly difficult to stitch nice hems. To avoid messy, wavy stitching at the hems, I decided to double the silk jersey on the Back and Sleeves by cutting with a fold at the finished hemline. In order to do this, the finished length had to be decided upon ahead of time. This technique worked beautifully and added a bit more weight to the jersey. The T-shirt slides on easily and has such wonderful drape!
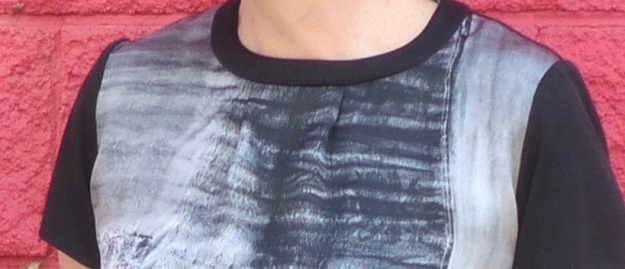
To compensate for the lack of stretch in the woven silk Front, I added two pleats to the Front at the neckline. This provided extra ease over the bust area tapering down to nothing at the hem.
Pattern
I used my favorite TNT T-shirt pattern, The Classics Fearless T-shirt #109 by Cecelia Podolak, as the basis for my top, but any basic T-shirt pattern can be used. Since the pattern was designed for knits and I was using a woven with no stretch, two pleats were added to the front at the neckline to allow for a bit more give across the Front. I added a total of 1 1/2” to the front at the neck edge distributed between two pleats, each measuring 3/4”. I positioned them 1 1/4” to either side of the center front, each pleat tapering down to nothing at the hem. This gave me two tucks placed 2 1/2” apart from each other.
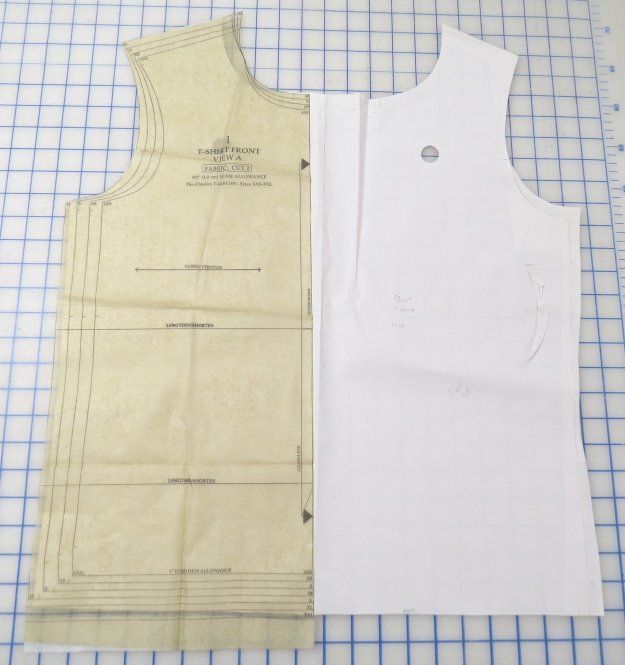
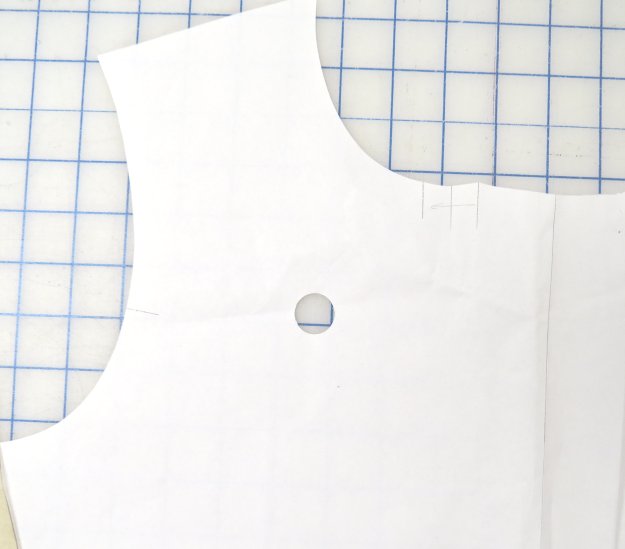
- Trace off a full pattern piece for the Front and Back from the pattern that needs to be cut on the fold. Remove the seam allowances from the Front, Back and Sleeve pattern pieces as the fabric will be thread traced on the stitching line. Be sure to note what your seam allowance is on your Tee pattern, as they will vary, and you don’t want to cut away too much! Decide on your finished length for the hem and sleeves before you cut out your fabric, since the Front, Back and Sleeve hems will be cut on the fold.
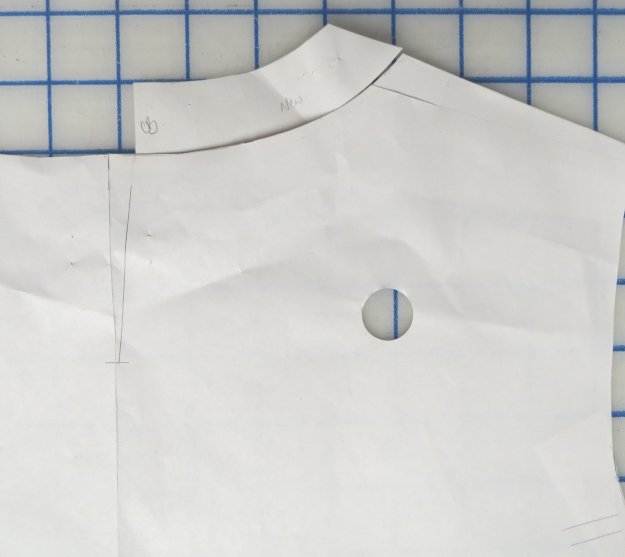
- To create a Neckband pattern piece on my pattern, I cut the View B neckline. I put the T-shirt pattern on my dress stand and marked where I wanted the finished neckline to sit. From this point I made Neckband pattern pieces for the Front and Back that were 7/8” wide. I added a seam allowance to all edges of the new Neckband pattern pieces
- I added a 4” slit to the centre back, which makes it easy to fit over my head. The 4” slit includes the finished width of the Neckband.
Fabric
The fabric used for the Front of the T-shirt was a printed silk charmeuse backed with silk chiffon. I purchased 3/4 yard of silk chiffon. The Back and Sleeves were cut from 1 1/2 yards of silk jersey in color J196. The Neckband was interfaced with bias knit interfacing.
Layout and Cutting
To cut out the Front, layer the silk charmeuse over the silk chiffon. This helps to
tame the fly away chiffon. Lay out the Front pattern piece using weights to hold it in place.
Thread-trace around the perimeter of the pattern piece. Remember that the seam allowance was removed from the pattern piece so the thread-tracing is your stitching line.
For the Back and Sleeves, lay out the silk jersey in a single layer. Thread-trace the Back and one Sleeve. Flip the pattern pieces over at the hemline and thread-trace them again. Repeat for the second sleeve.
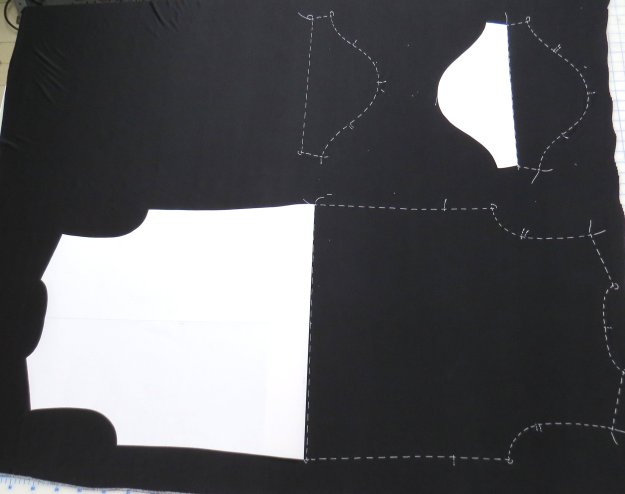

Once all pattern pieces have been thread-traced rough cut a few inches away from the thread-traced stitching line. The Front is not cut on the fold, so be sure to allow a 2 1/2” hem allowance on the Front.
Pressing
Use a warm iron and light pressure when pressing the silk fabrics. A heavy hand can mark the silk jersey. Steam and finger pressing also works well.
Stab-stitching
To permanently hold the chiffon and silk charmeuse together, the layers are stab-stitched together at the hemline and along all stitching lines. If the garment is altered, the layers will remain together rather than shifting apart from each other.
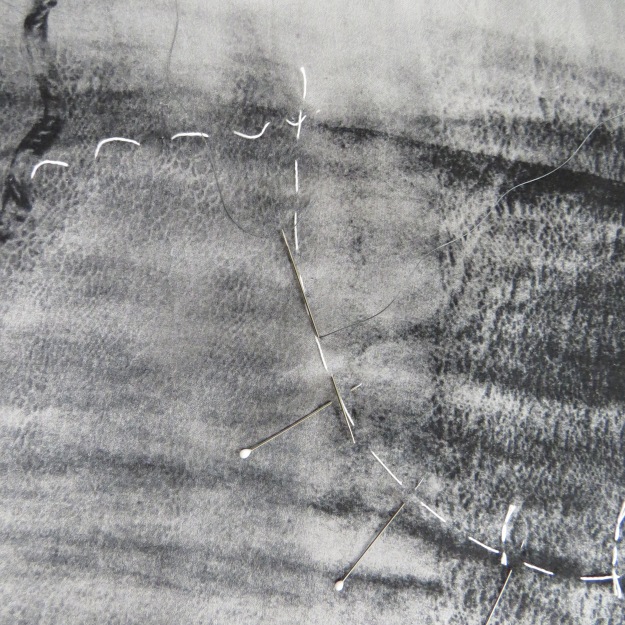
Stab-stitch just to the outside of the thread-tracing. Stab-stitching is done with Tire 50 weight machine 100% silk thread. Stitches should be approximately 3/8” long.
Once the two pieces have been stab stitched together, they are treated as one.
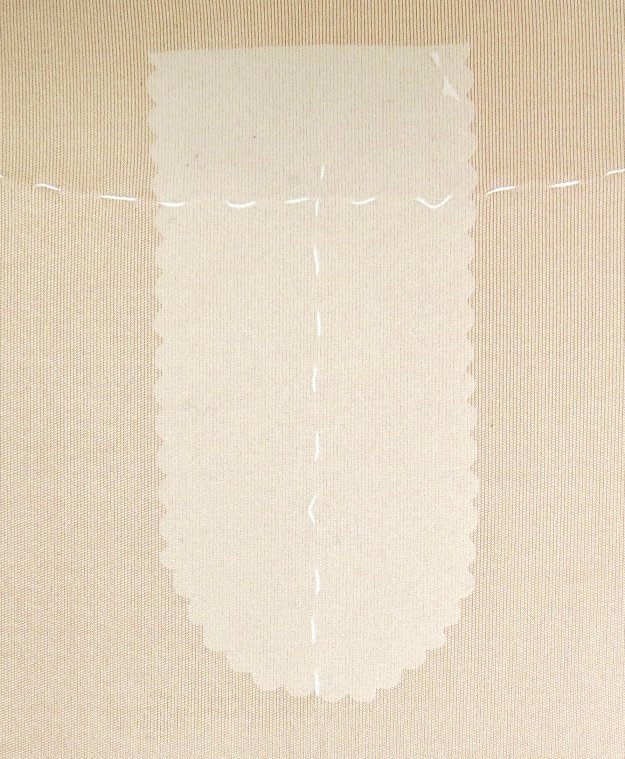
Front Hem and Pleat
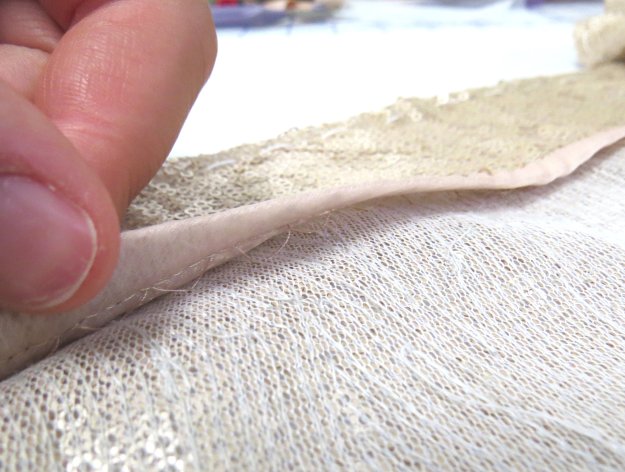
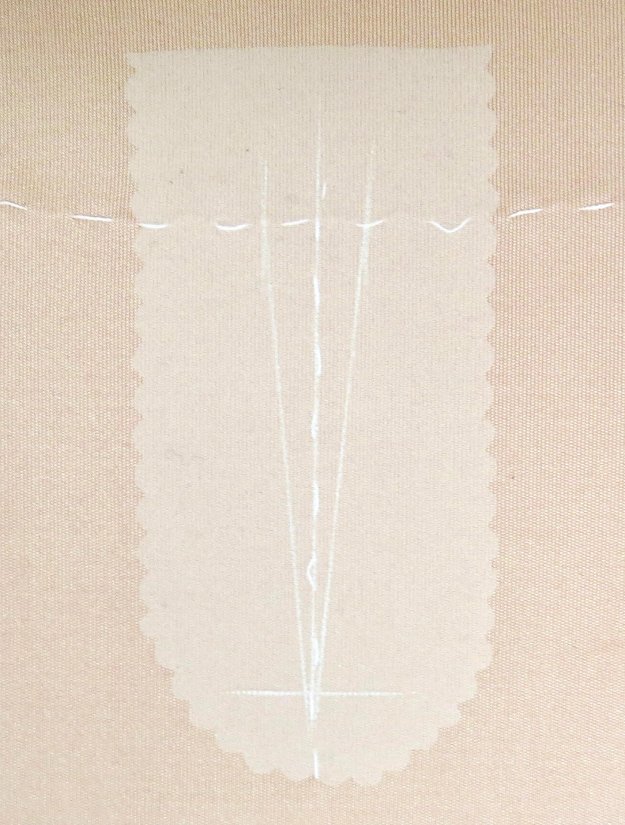
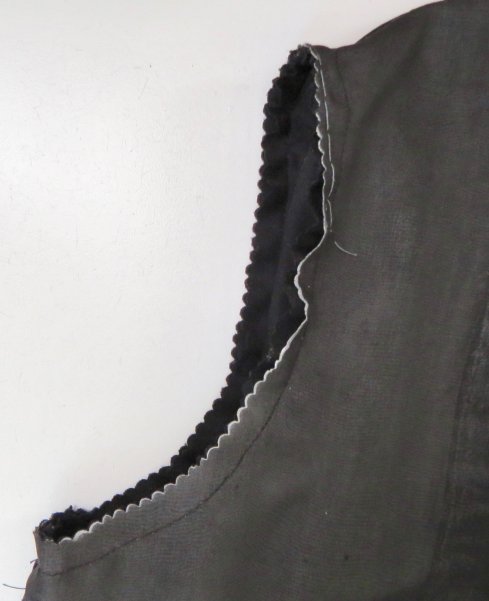
By backing the Front with silk chiffon it allows all stitching to be hidden. When the Front is hemmed, stitches will not show through to the good side of the fabric. The hem can be trimmed with pinking shears. I like to use scalloped pinking shears, which give a pretty, soft edge. Using silk thread, hand-overcast the edge. Take a stitch into each
peak of the scallop.

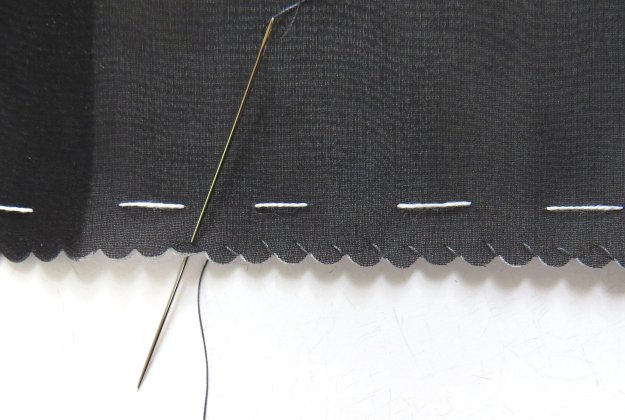
As you pull the thread through, it will fall into the valley of the scallop creating a nice even stitch. A hand overcast hem creates a much softer edge than serging. Turn up the Front hem along the hemline. Baste using silk thread to hold in place.
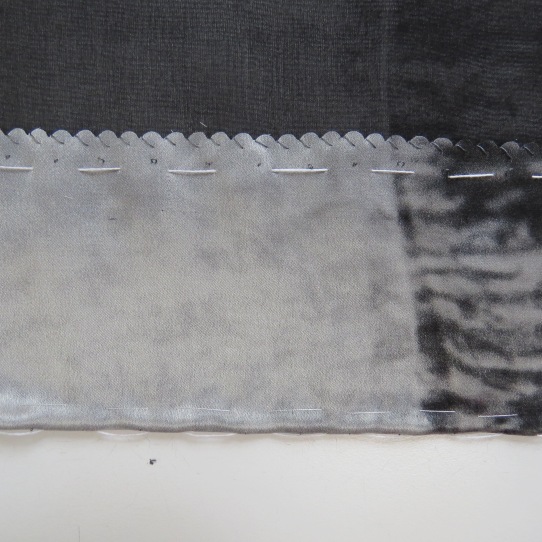
Thread tracing holding the layers together at the hem
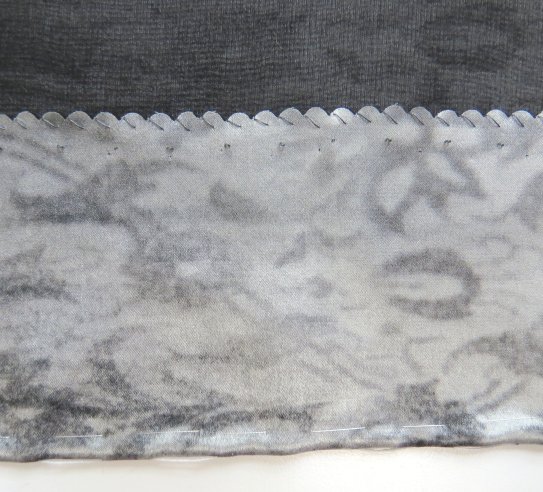
Finished hem
Hem-stitch the Front hem in place catching only the chiffon as you take each stitch.
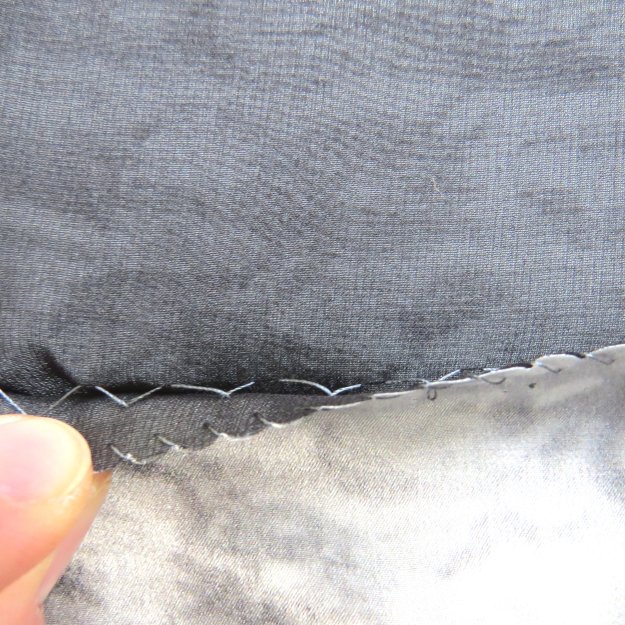
Hemming technique shown in sequin tee
Finished hem shown in sequin tee
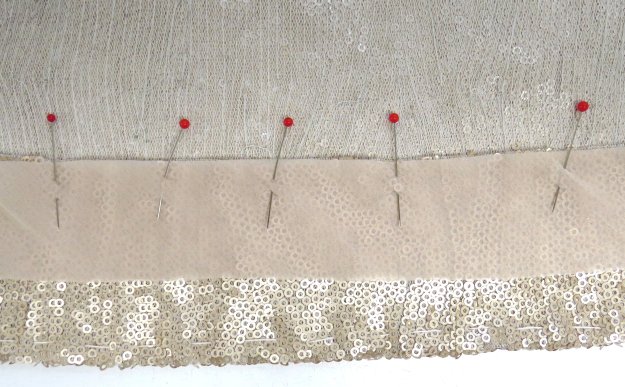
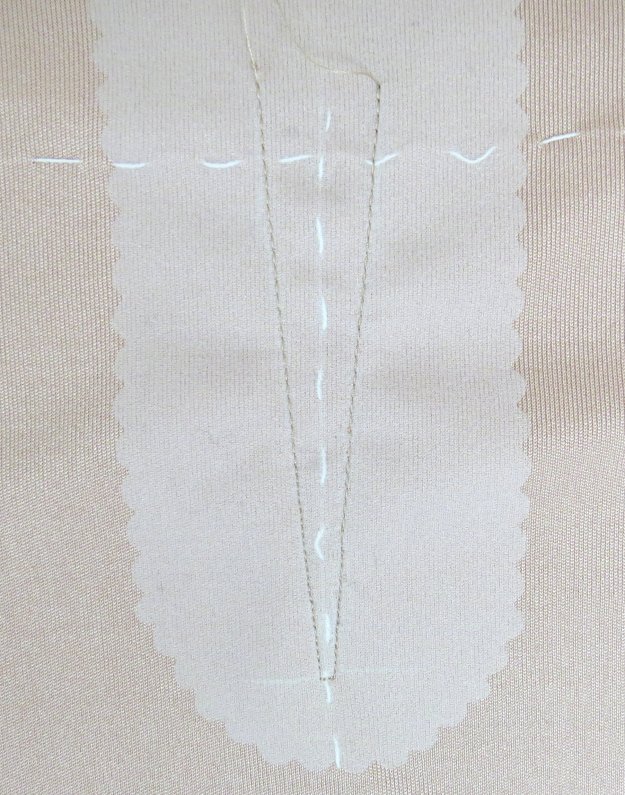
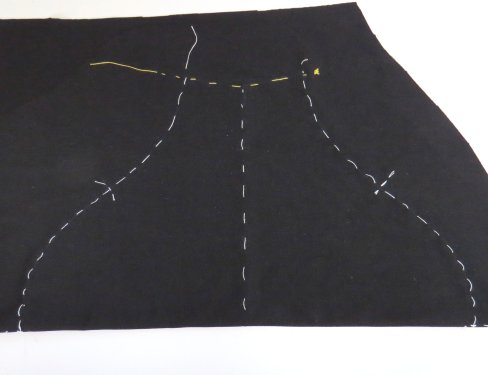
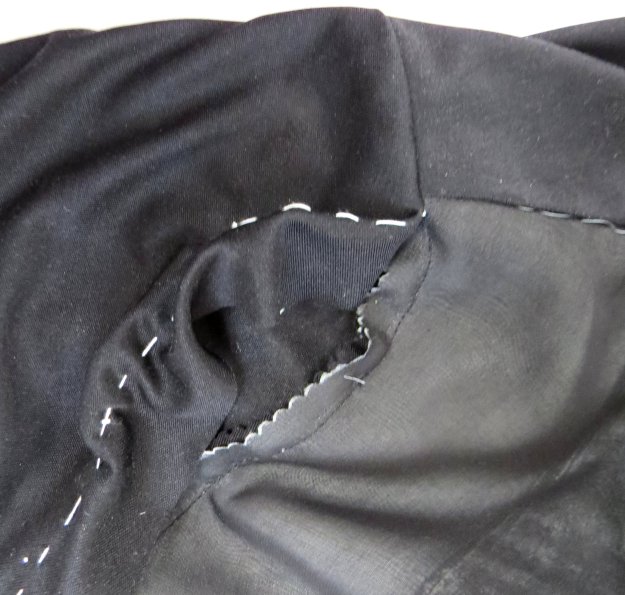
Mark the edges of the pleat with thread tracing. Bring the layers together to form pleats.
Baste to hold. Do not press. These are meant to be soft folded pleats.
Outside view
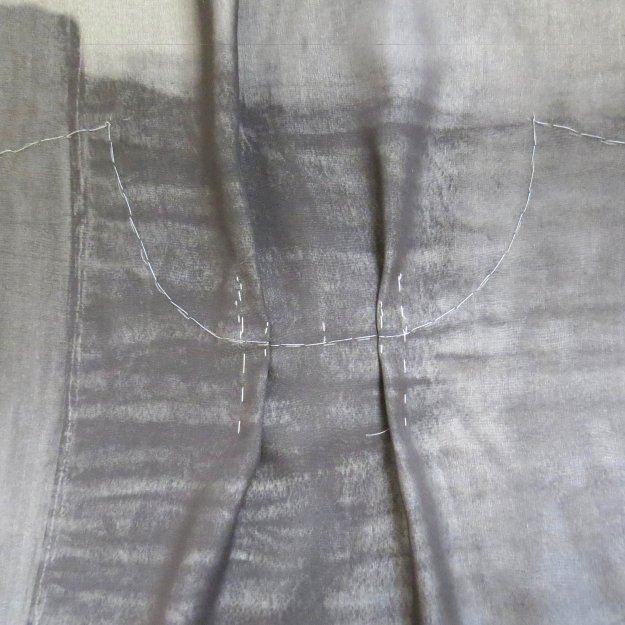
Inside view
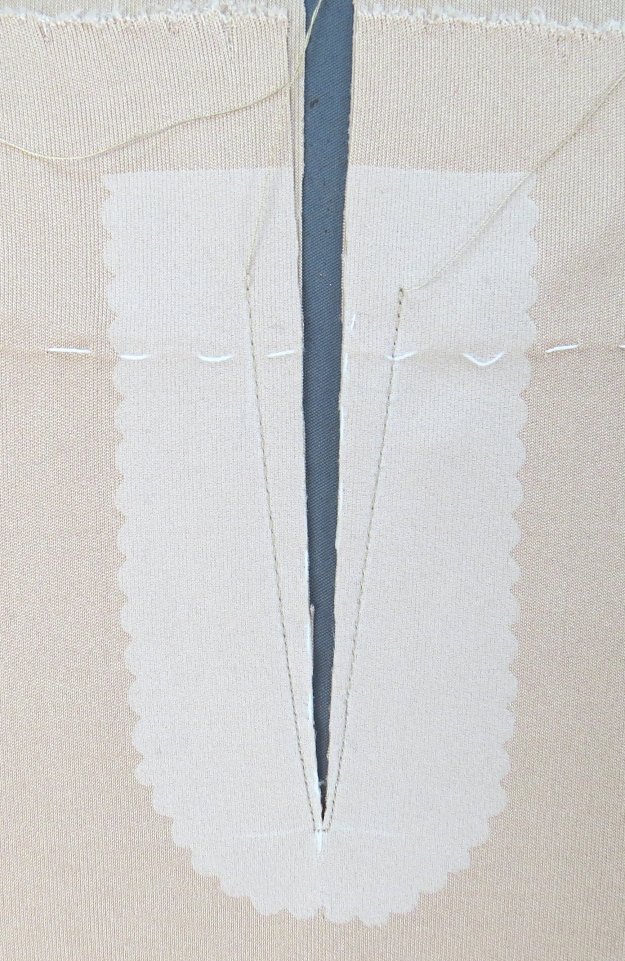
Center Back Slit
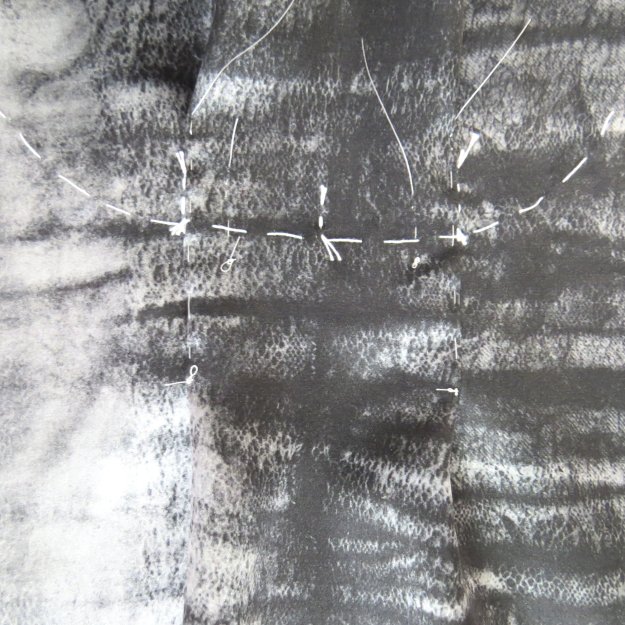
Fold the two Backs right sides together along the hemline. Stitch a narrow 3/8” x 3 1/2” V or dart along the center back. When nearing the bottom of the V shorten the stitch length to .5 mm to reinforce the point. Carefully cut down the centre of the V to the tip.
Turn the Back right side out and lightly press the slit.

Assembly
I was able to sandwich all of the seam allowances between the garment and the double layer of the silk jersey to create a garment which is entirely self contained and cleanly finished on the inside. Other than the turned up hem at the Front, the entire garment could be reversible!
Insert the Front between the two layers of the Back. Stitch seam. Pink seam allowances down to 3/8”.
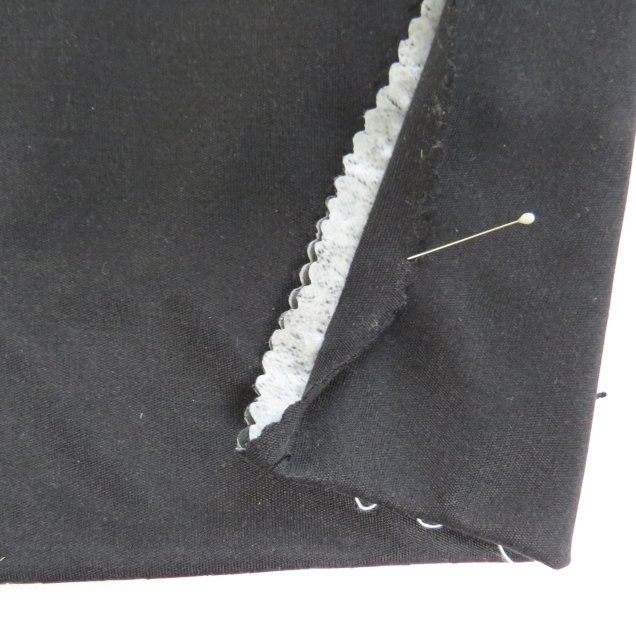
Sandwich the Front shoulder between the two layers of the Back shoulder. You can reach through the open armhole to do this step. Stitch. Pink seam allowance down to 3/8”.
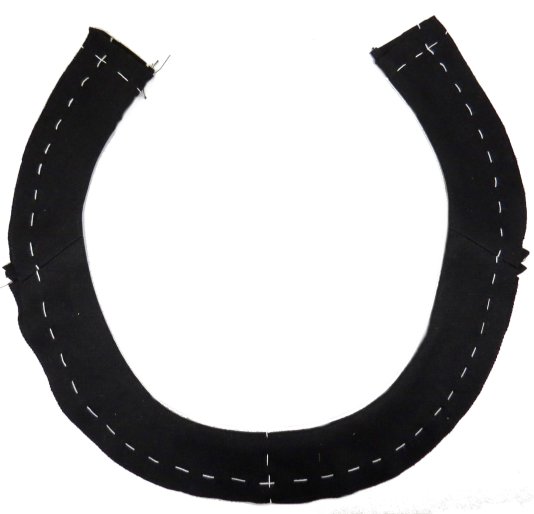
Neckband
Finish the neckband before inserting the sleeves. The neckband could affect the fit of the
shoulder slightly. It can be altered before putting in the sleeve if it is a bit too short.
Interface three scraps of pieces of fabric for the neckband. The Neckband Facing is not
interfaced. Thread trace the Neckband pattern pieces onto the fabric. Sew the pieces
together along the shoulder seams.

Trim the shoulder seams to 1/4” and press open. Prepare the Neckband Facing by sewing the shoulder seams, trimming and pressing open. Sew the Neckband and Facing together along the inside neckline the centre back edges. Trim the curve to a narrow 1/4”. Turn right side out and press. Under stitch the neck edge.
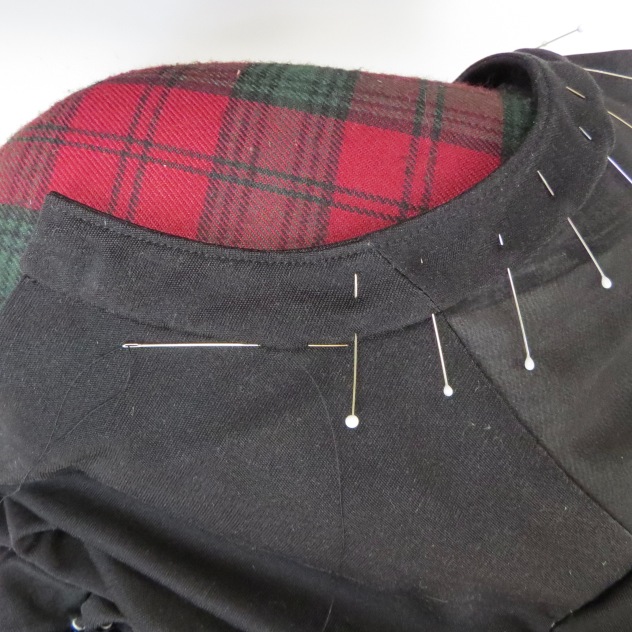
Lay the Neckband over the body of the T-shirt to check the fit. Join the Neckband to the neck edge. Trim seam down to 1/4”. Press seam towards the neckband. Turn under the seam allowance on the Neckband Facing and press. Trim to a narrow 1/4”. Pin Neckband Facing over seam. Slipstitch to finish.
Make a thread loop to close the back of the neckband. Stitch two strands of buttonhole silk thread back and forth across the left back neckband. Check to ensure that the loop is large enough to fit over a button with a shank.

Work buttonhole stitches over threads to complete the loop. Sew button to right back
neckband.
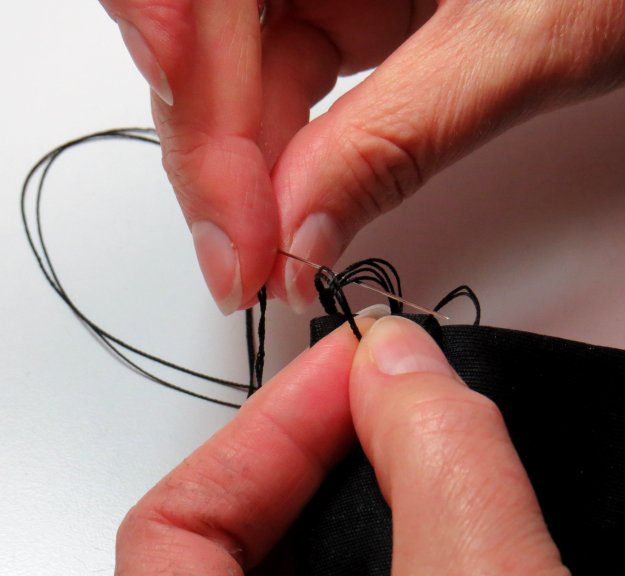
Working the buttonhole stitch

Pulling up the purl stitch of the buttonhole stitch
Sleeves
Baste the seam of the sleeve together. Fold the seam along the hemline and test for length. At this point the sleeve length could be altered by moving the thread tracing.
Insert one layer of the sleeve into the armhole and baste. Test fit. Stitch and trim seam
allowance to 3/8”.
Fold the sleeve lining up along the hem line and baste.

This next step is a bit like doing a ‘burrito’ yoke on a shirt! Bring the sleeve lining up into
position. You will be able to get inside the sleeve from the cap. Pin and baste the underarm section of the sleeve lining to the sewn sleeve seam allowance. Machine stitch. You should be able to get in and stitch from approximately the notch in the front to the notch in the back. Trim any excess seam allowance to match the sleeve.
Fold under the upper Sleeve cap seam allowance of the sleeve lining. Pin in place over the stitching line of the sleeve cap. Slip stitch to finish.


As ever, your work is impeccable and creativity brilliant. Thank you for the tutorial with your generous instructions and helpful suggestions. I always love seeing your garments. And one of the previous commentors was correct – you make us think that, with patience, we could do that too.
LikeLiked by 1 person
Basically wish to declare your current write-up is as shocking. The lucidity as part of your publish is just great and i possibly could believe that you are an expert about this issue.
LikeLike
A really generous sharing of KB’s knowledge base, achieved beautifully by being couched in a gentle, direct, tone of sincere encouragement. Once I started reading, I couldn’t stop, mentally sorting through my silk remnants stash the entire time. So, so many amazing couture skills and invaluable construction techniques. My Sunday’s planned!
LikeLiked by 1 person
This would make a really nice kit!
LikeLike
This is a FANTASTIC suggestion!!!
LikeLiked by 2 people
Fantastic tutorial. This has some really great construction techniques. Will definitely try it! Thank you so much, as always
LikeLiked by 1 person
Always so inspiring and simple steps to follow.
Christina
LikeLike
I recognize some of these hand stitches and finishes from class!
Lovely T shirts and useful tutorial. I love the simplicity and sportiness of T-shirts and suggestions to make elegant T’s are much appreciated.
LikeLike
Wonderful tutorial! Thank you so much.
LikeLike
I am definitely going to try this!!! Very nice!!
LikeLike
Very exciting to learn about. Will apply to pending knit constructions and to t-shirt options. Thanks for providing information.
LikeLike