Linen Love
by Kathryn Brenne
To see a list of all sewing tutorials, click here!
Linen is a wonderful fiber to wear in the summer months. It is cool, absorbent and breathable, and has a casual, breezy look. I wanted to make a linen dress for myself, using the medium weight cross dyed driftwood/tan linen , and to add interest I decided to create my own eyelet lace border. Using tone on tone embroidery thread, and a new technique, I was able to create a border design that gave this simple linen dress a sophisticated appeal, and was a lot of fun to do!


Pattern

Vogue V8970
Simple lines and an easy fit are best when working with linen. In general linen tends to be a looser weave, which can cause the fibers to separate under stress. I chose Vogue V8970, a simple raglan sleeve dress with front pleats, back darts, side seam pockets, collar and button front closing. It has a loose, roomy fit.
I lengthened view A, which has double pleats in the front and a fuller skirt, by 8”. This worked well for my frame since I am 5’9” tall. I wanted a below knee length dress with the eyelet border positioned above a narrow hem. The hem allowance was reduced to 5/8”, which made the hem on a full slightly circular skirt easier to manage.
Instead of creating box pleats for the front of the dress, I pressed the pleats flat and then
towards the side seams. This created pleats with tucks pointing inward giving a more slimming look. No pattern alteration was needed for this — it is merely a pressing technique.
I waited to finish the inner edge of the front facing until the embroidery was complete. I didn’t want the facing to show through the embroidery eyelets. Depending on the embroidery placement and the size of garment being made, the facing could be finished narrower tapering back up to the pattern width through the waist area.
Fabric
 One of the features of linen is its tendency to wrinkle. Pressing linen when it is wet can help to keep it crisp but this feature is definitely part of the distinctive look of linen. Linen is a plant based fiber, and since it is a brittle fiber it is best stored rolled or hung. Garments made from linen can develop permanent creases and actually wear out along the creases if they are stored folded.
I purchased 3 yards of linen, which was enough to cut a longer version of view A in size 12 and do a few test embroidery samples. I chose not to preshrink the linen but did press it. You can prewash the linen as an alternative, to preshrink and soften it. A web search will show just how much advice there is out there for pretreating linen, and I suggest that you study some of these suggestions and decide what works best for you.
I used a lightweight woven fusible interfacing #16510 for the collar and front facings.
Needles and Thread
For general construction I used a Universal size 70 needle.
For the machine embroidery I used a sharp size 75 needle.
Gutermann 100% polyester all purpose thread was used for construction.
Isacord 100% polyester embroidery thread in color 0874 was used for the machine embroidery. It is important that the thread used for embroidery be 100% polyester.
Pressing
Linen stretches when wet. It is best to press the garment with a hot iron while slightly damp. After completing the embroidery I washed the dress on a gentle machine wash. I put it in the dryer for a few minutes to take some of the moisture and wrinkles away and then pressed it dry with the iron.
Linen takes a press very well. But because it is a brittle fiber, marks from alterations to parts of the garment that have been pressed maybe difficult to remove, so be sure to perfect your muslin before working with your linen, and check your work as you go to avoid mistakes that may leave marks on your fabric.
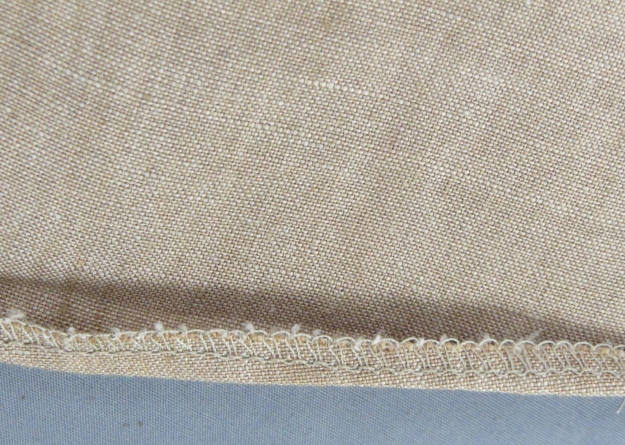
Finishing Seams
Since linen ravels easily, serged seams or French seams are perfect options. This medium weight linen would have been too thick for French seams, so serging was a quick and easy choice. It is easy to press the serged seams after the garment is complete and also after laundering.
Care
Linen machine washes very well. Tumble dry for a few minutes, hang for a short amount of time and then press while still damp.
Construction Tips and Techniques
For the most part I followed the pattern directions. The dress was completed other than
hemming before the embroidery was stitched. Following is a description of the techniques that were done differently than the pattern guide sheet.
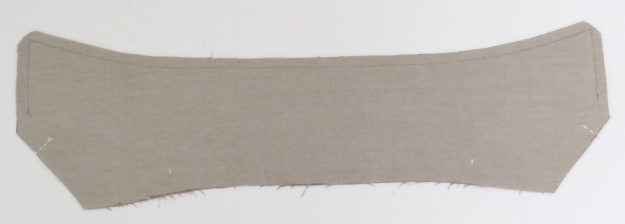
Collar
Trim a scant 1/8” off of the under collar before beginning the collar.

Interfacing was fused to the upper collar.
To stitch the corners perfectly, use a ruler to lightly pencil the stitching line onto the
interfacing at the corners.

Stitch on the penciled line.

Trim seam allowances to 1/4”.
Turn the collar right side out and press, rolling the seam slightly towards the underside.
To edge stitch perfect corners, use an edge stitching foot and move the needle two
positions to the left. Stitch to the corner and remove the collar from the machine leaving long thread tails. Leave long thread tails at the beginning as you start stitching in the opposite direction. This prevents the corner stitch from looking slightly off or crooked. Take all thread tails through the corner stitch, unpicking one stitch if necessary. Tie off the four thread tails on the under collar. Thread the ends through a self threading needle. Feed the needle through a stitch. Pull ends tightly and the knot will disappear into the stitch. Clip thread tails.


Once complete, the corner stitching should be perfectly sharp and square.


After the front facing is attached, edge stitch the front and notch ending one stitch into the edge of the collar.
The best stitch quality is always with the good side facing up. Stop and start your edge
stitching making sure the good side is facing up. Leave long thread tails and pull them to the wrong side. Knot off, thread into a self threading needle and bury the thread tails.
At the notch of the facing and collar, finish the last stitch by hand. One stitch can join the two rows of edge stitching together.

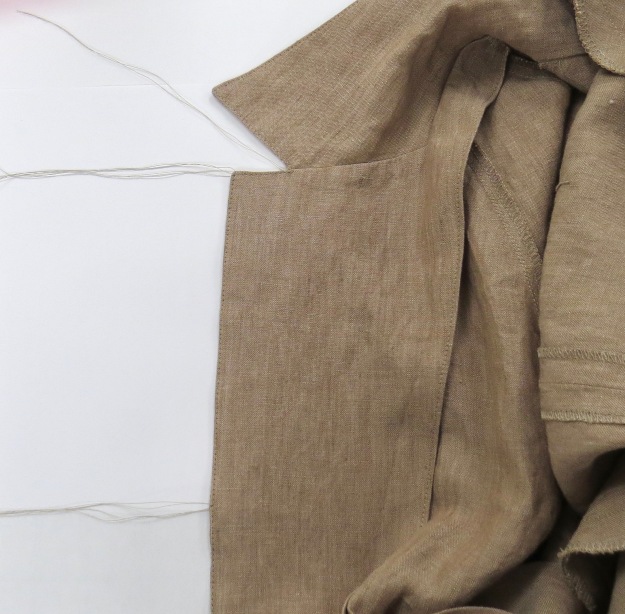
Pockets
Fuse a strip of interfacing 1” wide by the length of the pocket opening to the front and back pocket openings before beginning the pocket construction. After attaching the pocket bags, edge-stitch the front to keep it in place.

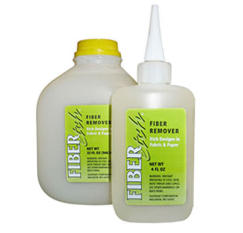
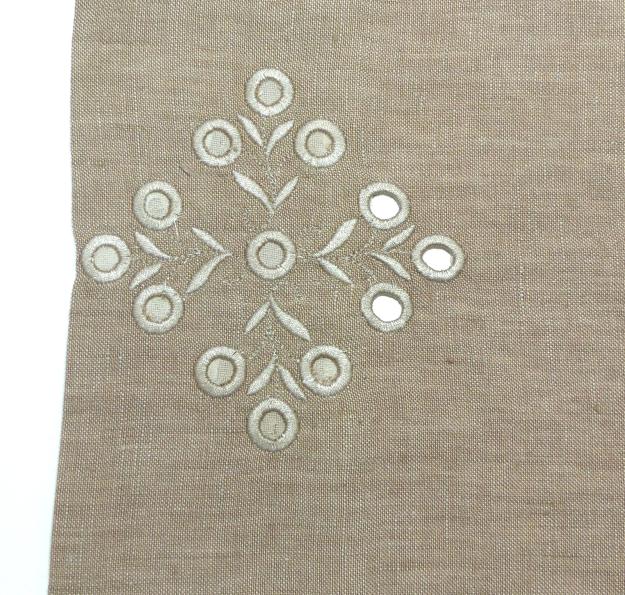
Embroidery

I had been wanting to try Fiber Etch® for a while. Linen was the perfect choice to try this fiber remover. The product works best on linen or cotton. It must be used with 100% polyester or synthetic thread to prevent the sodium bisulfate from eating away other areas of the garment. Test this technique on a sample first.
I purchased a cutwork embroidery design from embroiderydesigns.com. The design I
purchased was a cutwork diamond FL749. I used tear away Floriani Wet N Gone water soluble stabilizer.

I tested out different colored threads before deciding on the sophisticated look of tone on tone embroidery.

From one of my test samples I learned that although the embroidery could stitch through two layers, the Fiber Etch® would not work on the synthetic fusible interfacing I had applied to the front facing.
After stitching out two designs side by side, I worked out the placement along the bottom of the skirt. I used pins to mark the placement area.
Attach the water soluble stabilizer to the back of the fabric to be embroidered using a
temporary spray adhesive. I hooped the fabric and the stabilizer using the grid that came with my hoop to center up my pin markings. I stitched out two motifs at a time before repositioning the hoop. After the embroidery was complete I carefully removed most of the water soluble stabilizer.


Use an eye dropper to paint the eyelets of the cutwork embroidery being careful not to
accidentally drop any Fiber Etch® onto other areas of the garment.


Use a hair dryer to dry the Fiber Etch® .

Use the iron to press the motifs. Apply heat until the eyelets turn dark brown.


The brown areas become brittle and are easily removed with an awl.


On the seams, apply a bit of the Fiber Etch® to the wrong side of the embroidery.
After removing most of the stabilizer machine wash the garment on a gentle cycle with detergent to get rid of the remaining stabilizer. This also will clean up the eyelets nicely.

Hem
The front skirt is full and ends up being on the bias by the time it gets to the side seam. Rather than easing linen into a 1 1/2” hem, which would be difficult to do, I chose to make a narrow hem, the same as for the sleeves.
To make a narrow hem, chalk a 5/8” hem allowance. Press up hem. Fold edge of hem allowance down to the fold and crease.
Pin hem in place easing in fullness if needed.

Baste narrow hem in place. Edge stitch close to the folded edge.

Buttonholes
I enjoy making handworked buttonholes. There were nine buttonholes down the front of this dress.
Chalk the center of each horizontal buttonhole. If you were careful cutting out the fronts, the center of the buttonholes should lay perfectly on grain.

I used the rectangle bound buttonhole stitch on my machine to outline a narrow square ended buttonhole. Reduce the stitch length to .6 mm and the width, which reduces the width of the rectangle,to 2 mm. Apply a small bead of Fray Check down the center of the stitching. Let dry and then cut down the center.

Work a buttonhole stitch using a double strand of Gutermann 100% polyester all purpose
sewing thread. I take three stitches across each end to create a square buttonhole.

Good side of the buttonhole

Wrong side of the buttonhole
Finishing
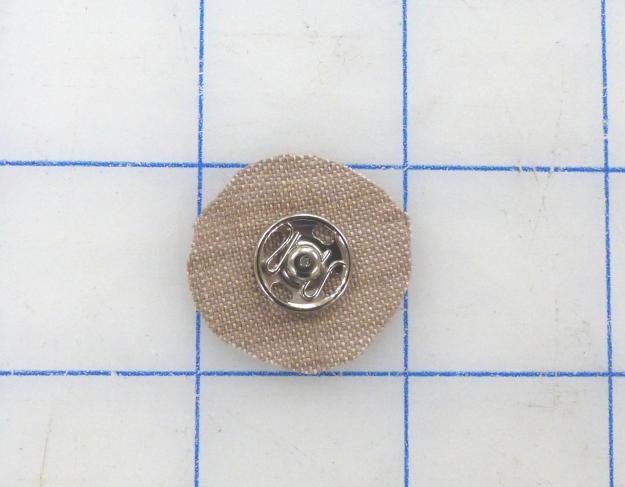
I found that the front of the dress pulled open a little bit due to the weight of the pleats. To keep it closed I made a self covered snap. This is a techniques I learned from British couturier Jon Moore.
Use an awl to put a small hole in a scrap of fabric.

Position the male portion of the snap through the hole.

Close the snap with the female portion. Trim the scrap to a circle.
With the snap still closed, sew a gathering stitch around the perimeter of the circle.

Pull up the gathering thread and oversew the back of the snap with a few stitches before
ending off.


Repeat the process, this time using the finished side of the snap to close the other half of the snap.

Pull up the gathering thread.

Finished snap.


Give the finished snap a press to flatten the back.

Sew the finished snap between the two waist buttons on the dress.

I used a very small catch stitch to sew the facing to the waist of the dress. Be careful to only pick up the tiniest thread; otherwise stitches will show through on the good side of the garment.

