
A Special Occasion Embroidered Mesh Dress
by Kathryn Brenne
To see a list of all sewing tutorials, click here!
 A beautiful embroidered mesh fabric inspired this over the top dress that can be worn two different ways. Perfect for a special occasion, the mesh dress can slide over a bustier and crinoline for a dressy look or top a colored silk slip for a less formal look. A simple design is best suited for this fabric with enough embellishment to stand on its own. With its winning price point and a bit of time, you too can create a drop dead gorgeous look! (More photos at the bottom of this article!)


Fabric
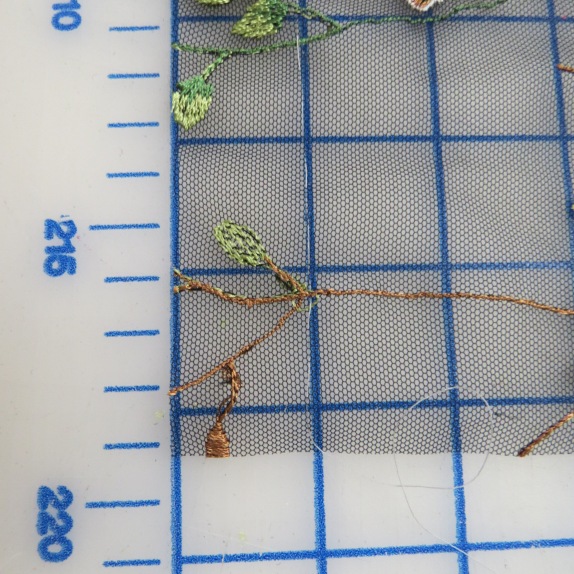
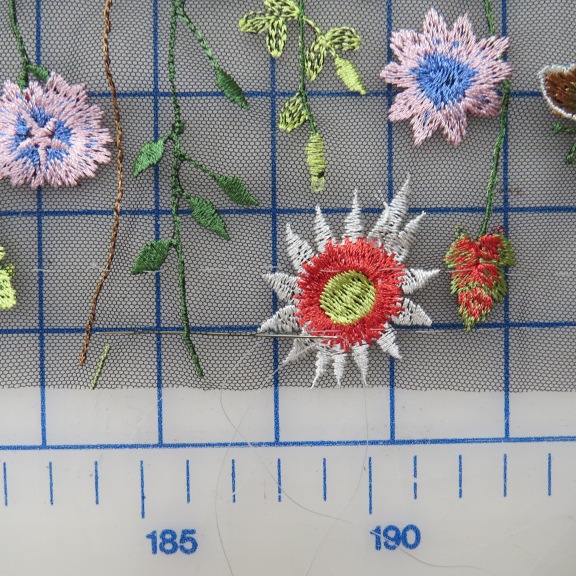
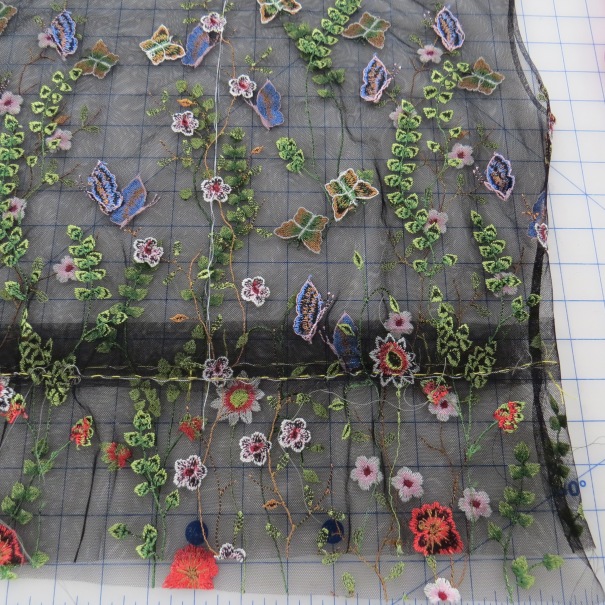
The embroidery on the 58” wide mesh fabric runs along the selvedge and tapers off into plain mesh along the opposite selvedge. I purchased 3 yards of this stunning fabric #60475 (also available in white and nude), which was enough to make a very full skirt that could be worn over a crinoline. (I wear approximately a size 12/14. If you are smaller or larger, you might consider adjusting the yardage, or having slightly more or less fullness at the waist.)

The skirt was cut along the heavily embroidered selvedge. The bodice was cut so that the top ran along the plain mesh selvedge. And I still have enough fabric leftover to cut a little top with sleeves!
I debated whether to purchase a crinoline or build my own. I decided to build my own in order to get the correct fullness and length. To build the crinoline I used half a yard of black four way stretch spandex bathing suit fabric, 3/4 yard of black silk taffeta, ten yards of 72” black stiff crinoline netting and a length of 2” wide elastic for the waistband (these were all fabrics I had on hand and were not purchased from EOS).
Needles, Thread and Notions
To sew the embroidered mesh fabric I used a size 60 Universal needle and 50 weight 100% silk thread from Tire. To finish the neck and armhole edges by hand, I used a size 16 beading needle and 100 weight 100% silk “kimono silk” thread from Superior Threads.
A long darner size 12 was used to hand gather the mesh fabric.
I put a 14” invisible zipper with mesh tape in the side seam of the dress. (I purchased a 22” zipper and cut away the excess.) I inserted a length of 1/8” elastic through the waist of the dress.
Pressing
All of the fabrics used in this project are very heat sensitive. Reduce the temperature of your iron to a Nylon setting and use steam sparingly. Test pressing techniques on a sample first before working on the project.
Crinoline
 I built the crinoline before starting on the dress as this would determine the fullness and length of the overlay. I wanted the dress to look like it was floating atop the crinoline. The dress is actually a few inches shorter than the crinoline; the crinoline lifts the mesh fabric nicely and since the mesh of the dress is soft and the cut edge of the crinoline is stiff this also prevents the crinoline netting from catching the hem of the dress and snagging it.
Once the crinoline was built it was easy to lay the embroidered mesh fabric over the crinoline and decide on a finished length for the skirt of the dress. Note: I am 5’9” tall and the suggested lengths given are appropriate for a tea length dress on me. They can be shortened or lengthened as required for your size.
Instructions for making a crinoline:
1. Finish both edges of the 3/4 yards of black silk taffeta with a serged rolled hem. Serge the selvedge edges of the silk taffeta as an edge finish for the seam that will be sewn later. Machine baste two rows of stitching 1/4” apart along the top edge of the silk taffeta. These rows of stitching will be pulled up (not yet though!) to gather the taffeta. I used contrasting thread and a very long stitch length. The contrasting thread will be a guideline for positioning my stitches later on. Chalk and thread trace a straight line 5” down from the top edge of the taffeta.

Chalk and thread trace a straight line 10” up from the hem of the taffeta.
Sew the center back seam of the taffeta together. Press seam open.
2. For the bottom layer, cut long strips of crinoline netting 10” wide. Use a Ruffler attachment (if you have one) to gather the crinoline netting. Experiment with the settings on the Ruffler, which affect the amount of fabric that is pushed into the gathers. For the shortest layer of crinoline netting, which is placed at the bottom of the crinoline, I used the number 6 setting. This setting pushed a lot of fabric into each pleat. I wanted the bottom layer of netting to be quite stiff and full in order to hold up the other layers. From your samples you will get an idea of how many strips are required to create a finished gathered length to fit around the taffeta skirt, which is 54” in circumference.
Run the crinoline netting through the Ruffler attachment using a stitch length of 3 mm. When attaching a new length of netting, don’t bother to seam the netting. Instead overlap the cut ends and continue to feed them through the ruffler. The netting is so full that cut edges are not noticeable. I prepared a bit more netting than I needed and waited to cut the excess off until after it was attached to the skirt.


3. Position the gathered netting onto the taffeta skirt along the lower tack line. Pin in place. Using a stitch length of 3 mm and a stitch width of 3.5 mm, zig zag the netting to the skirt. As you stitch, smooth out the taffeta so it does not accidentally get tucked into the stitching.

Sewing the netting to the tack line
The next layer of netting is cut 22” wide. This layer is not as full as the bottom layer. Reduce the setting on the Ruffler to space out the gathers. Try moving it to a setting of 12.

Attach the second layer of netting to the taffeta skirt at the upper tack line.
4. The 1/2 yard bathing suit base layer holds everything in place and works almost as a shapewear garment. I cut the fabric with negative ease, a few inches smaller than my hip measurement and joined the cut edges together with one seam at center back using a four thread serge stitch. I curved the seam towards the waist to give it some shaping and left the lower edge unfinished.
Cut elastic to a comfortable waist measurement. Seam the elastic together with a 1/2” seam allowance. Press seam open. Cover the seam with a piece of bathing suit fabric. This creates a neat finish on the inside of the waistband and keeps the seam allowance flat making it comfortable to wear.
Divide the elastic and spandex into quarters. Pin the elastic to the spandex skirt matching quarters.

Use a cover stitch or twin needle to sew the lower edge of the elastic to the bathing suit fabric.


Trim spandex close to cover stitching.
5. Mark a line 3” down from the lower edge of the elastic. Mark quarters on this line. Divide the upper edge of the silk taffeta skirt into quarters. Pin the quarters of the silk taffeta to the spandex. Pull up the basting threads and pin the remainder of the silk taffeta skirt to the spandex. Position your zig zag between the two rows of basting threads and zig zag the silk taffeta skirt to the spandex. . The zig zag stitch will allow the silk taffeta skirt to stretch with the negative ease of the spandex skirt.
6. A final layer of netting is sewn just below the waistband. This layer smooths all of the other layers and lifts the skirt away from the waist. Measure from the bottom of the waistband over all other layers to the bottom of the crinoline. This top layer of netting should be slightly longer because the previous layers will lift it. For my crinoline I cut the final layer 32” long. As with the previous layer, run the netting through the ruffler at a setting of 12. Pin the netting just below the waistband and zig zag to the spandex. I staggered the cut ends of the netting from previous layers so that they would not all spread open at the same spot.
*Note: I purchased a black bustier to wear with the crinoline and sheer mesh dress but feel free to make your own!
Mesh Dress
Skirt
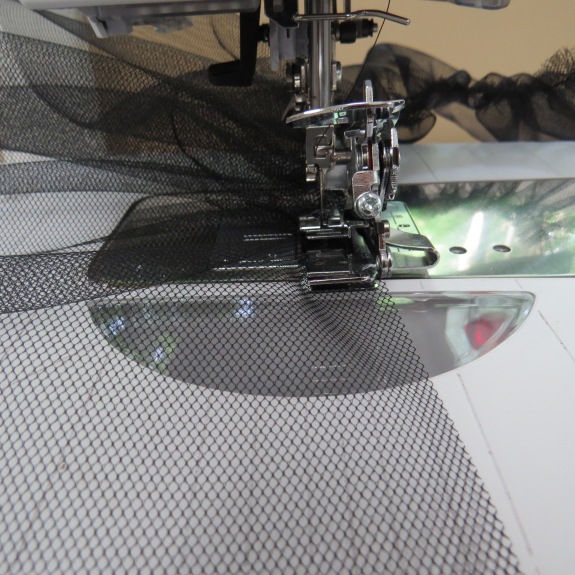
With the crinoline finished you can now focus on the mesh dress! Using a rotary cutter and a long Olfa ruler remove the selvedge from the heavily embroidered side of the mesh fabric. The hem of the dress will be left as a raw edge so it is important that this job be done neatly and evenly.
Try on the bustier and crinoline. Lay a length of mesh embroidered fabric over the crinoline with the heavily embroidered selvage at the bottom. Position the edge of the mesh fabric approximately 2” above the longest layer of crinoline netting. Once you are happy with the look and length of the embroidered mesh, mark the waistline.
Cut the embroidered mesh, allowing for a 1” seam allowance above the waistline mark. The mesh is cut as one long strip of fabric. I found it helpful to lay the mesh flat on my big cutting mat. I could see the lines of the mat through the fabric and could simply follow a line along the entire length.

To create very soft gathers around the waist of the skirt, the mesh fabric was hand gathered. Although this seems like a daunting task, it moves along fairly quickly once you get started, and the result is worth the effort.
To hand gather, use a long darner size 12. Position a spool of contrasting 100% polyester
Gutermann thread on a thread stand. Rather than cutting a very, very long thread and trying to work it through the fabric, the thread can be held on the thread stand and more thread pulled off as needed, preventing the thread from tangling.

Working on a mat with lines, align the upper edge of the mesh along a line of the mat. Working 1” away from the cut edge, run a row of stitches spaced approximately 1/4” long and 1/4” apart along the edge of the fabric. Pull off thread as you need it and pull through the fabric. Leave long tails of thread on each end of the fabric when finished.
Reposition the fabric so that the cut edge is laying 1/2” above a line on the mat. Run a second row of stitching parallel to the first and 1/2” above. Once again I used the line of the mat as a guide to keep stitching straight. Divide the length of fabric into quarters and mark these sections with a short tack in the seam allowance of the waist.
Gently pull up the gathering threads. Place one hand over the fabric as you pull up the two rows of hand gathers.

Using the motifs of the embroidery as a guide, evenly distribute the gathers to a measurement that is slightly bigger than your waist measurement. I allowed a 1” seam allowance for the only seam in the skirt, which was placed on the left side.


Mark the lower position of the side zipper with a tack placed 7” below the waist seam. Stitch a french seam in the mesh from the tack to the hem. To make a french seam place fabric wrong sides together and stitch a 3/4” seam allowance. Trim close to stitching. Press seam to one side. Fold fabric back on itself right sides together. Stitch seam a second time using a narrow 1/4” seam allowance. Press seam flat and then toward the back. The mesh will have to be clipped carefully to allow the seam to lay towards the back and the seam allowance above the tack to open flat. Set the skirt aside while you continue with the bodice.
Bodice
The pattern for the bodice is a scoop neckline with a little cap shoulder line. I used Butterick B6166 as a guideline but any little top or simple dress pattern could be used. The neck opening needs to be scooped wide and low enough for your head to fit through. The little cap shoulder is an extension of the shoulder line. I fit the bodice loosely through the waist. Although this pattern called for moderate stretch knit fabrics, I omitted the back darts and cut the side seams a bit straighter and it worked well.
Hold up the remaining fabric to determine where to position the motifs. Avoid placing a flower or butterfly directly over the bust point. I found that a branch of flowers centered up nicely on the Front while a meandering path of green ferns worked well on the Back. I positioned the motifs with more flowers at the waist dispersing to nothing towards the shoulders.

Lay out the Front and Back pattern pieces. Thread trace the stitching lines. Rough cut 2” away from the stitching lines. This allows you to pin the bodice together, try on and adjust if needed.
Thread trace center Front and center Back.
Baste the bodice together and try it on to asses the fit, neckline scoop and shoulder line. I
didn’t over fit the bodice through the waist but put in small gathers for 2” at the waist below each bust point. Mark the waistline. Allow a few inches of ease around the waist. This is taken up with a bit of narrow elastic once the waist seam is finished.
Carefully trim Front and Back necklines 1/4” away from the stitching line.

Press 1/8” over around the neckline. It is helpful to anchor the fabric to the ironing board with a pin. This allows you to put a bit of tension on the fabric as you roll and press over the 1/8”. Roll the neckline over a second time another 1/8”. Pin.

Using a fine beading needle and kimono silk thread use a running stitch to sew the neck in place. Position stitches close to the folded edge.
Stitches will disappear and not be visible from the right side of the garment. 
(I did try a slip stitch first, but the slight angle of the stitches was noticeable from the right side.)
The finished neckline should look narrow and lay flat.
Baste the shoulders wrong sides together. Sew 1/8” away from basting.
Trim close to stitching. Remove basting. Press seam towards Back and then fold right sides together.

Pin seam and stitch again using cut edges as a guide to stitch 1/8” away from edge.
Rather than backstitching, leave long thread tails, which can be knotted and buried in the seam allowance.
Trim 1/4” away from the thread tracing around the armholes. If there are any embroidered motifs laying within the seam allowance, carefully remove them by unpicking the threads.

On my bodice a bit of a fern leaf and butterfly had to be unpicked.
Finish armholes in the same manner as the neckline.

Before picking

After picking
Sew a french seam in the right side of the bodice.

Finish the 2” below the left armhole with a french seam. The remainder of the seam will be left open to insert the zipper.

Carefully clip the mesh to allow the lower portion of the seam to be opened while the french seam is pressed towards the Back.

Cut a 2” strip of plain mesh from the remaining fabric. This will be used to finish the waist seam. The length of the strip should be the waist measurement plus a few inches.

Baste the strip of mesh to the inside of the bodice. Position the mesh 1/2” below the waistline with the remainder laying above the waistline.


Pin the skirt to the bodice aligning the quarter markings with centre Front, centre Back and side seams. Adjust gathers if needed. Machine stitch using a straight stitch. Trim seam allowances to 3/8”.

Wrap binding over seam allowance and pin to hold. Baste. Machine stitch a second time over previous stitching. This will create a casing with the binding. Trim binding close to stitching.

Zipper insertion
Press seam allowance of left bodice and skirt open.

Use double sided Wonder Tape to position invisible zipper in place. The stop at the top of the zipper should be placed just below the end of the french seam of the bodice.


Machine stitch.

Close the zipper and tape the second side of the zipper to the seam allowance. Place a pin at the waist seam line to prevent it from shifting during stitching. Stitch.

Trim zipper tape to an even 1/4” width.

Stitch across the end of the zipper 1” below the end of the opening.

Using a stitch width of 2.2 mm and a stitch length of 1.5 mm zig zag over the edge of the
trimmed zipper tape attaching it the seam allowance of the mesh fabric.

Trim excess seam allowance close to stitching.

Use a tiny whipstitch to join the upper ends of the zipper tape together. Anchor the end of the zipper tape to the french seam allowance with a few stitches.

Cut away excess length from the end of the zipper. Finish the cut end with a piece of mesh fabric binding.

Sew the binding to the end of the zipper tape. Wrap binding around the end and stitch. Trim away extra width from binding.
Cut a tiny opening in the waist casing. Feed 1/8” black elastic through casing and adjust to fit. Secure ends of elastic with a few hand stitches. Tack edge of zipper tape and seam allowance to waist seam with a few hand stitches.


This is an absolutely stunning piece of work, and such generosity in sharing your stitching techniques.
LikeLiked by 2 people
This is terrific information .This pretty much the wedding dress my DIL wants . so very serendipitous.
LikeLiked by 1 person
Beautifully done, very couture!
LikeLiked by 1 person
Your dress is lovely!! Thank you so much for your very helpful tips on both assembling and working with the embroidered mesh. Making my MOB dress now for next year, I am finding them so helpful!!
LikeLiked by 2 people
Beautiful, classy. Timeless; 3 years later, I am considering your idea for a 2020 wedding.
LikeLiked by 2 people
Thank you so much for giving everyone an extraordinarily special opportunity to read critical reviews from this site. It’s always very enjoyable and jam-packed with amusement for me and my office colleagues to search your web site a minimum of thrice in a week to see the newest tips you have. And definitely, we are at all times amazed with all the wonderful tactics you give. Selected 1 areas in this post are particularly the finest we have all had.
LikeLiked by 2 people
This is beautiful and your detailed instructions must helpful.
LikeLiked by 1 person
Absolutely stunning and rich. You engineered the construction like a Boss!
LikeLike
Your dress is an absolute dream!
LikeLiked by 1 person
Pingback: Fashion Revolution – how about a sewing revolution? - Time to Sew
Thank you so very much for sharing your steps to creating this magnificent gown. I hope that you feel like a fairy princess on every occasion that you wear it. And may there be many!
LikeLiked by 1 person
Just Wonderful! I am sooo inspired!
LikeLiked by 1 person
This dress leaves me breathless! Thanks for sharing so much of the process! It’s truly a knock-out!
LikeLike
Brilliant. Seeing your process was inspiring. Thank you.
LikeLike
What an elegant gown; just as beautiful as any purchased from an haute couture designer! Impeccable workmanship. Question: how did you keep that much net from moving as you were cutting/sewing?
LikeLike
My nickname is MotorMouth, because I talk so much, and I have this to say, OMG!!!!! Thank you so much for sharing, for teaching, for allowing us a peak into a very remarkable mind.. Thank you again for the inspiration.
LikeLike
Stunning. Thank you for sharing your process.
LikeLike
Words don’t express the beauty of this dress!!
LikeLike
This is completely gorgeous!!!!
Lori
LikeLike