Mud Silk Adventures
by Kathryn Brenne
To see a list of all sewing tutorials, click here!
 Mud Silk has been produced in the Guangdong Province of China since the Ming Dynasty. Using natural resources of sun, water and silt from the river, the Chinese have perfected a technique for creating a fabric that is very comfortable to wear. It repels water, is breathable, anti-bacterial, quick drying and offers some UV protection making it particularly suitable for hot, humid climates.
The process involves dying a base fabric. Originally the color was obtained from a yam-like vegetable only found in this area of China. It produced an orange, umber color. Today other tannin-rich vegetable dyes are used to give a wide range of color variations. The fabric can be dyed several times depending on the intensity of color desired. After dying, the fabric is laid out in fields to dry. One side  of the fabric is coated with silt from the nearby Pearl River delta. It is left to bake in the sun for up to a week. Through a combination of heat from the sun, moisture from the dew, silt found in this portion of the river and tannins in the dye, a chemical reaction is created in which the silt binds itself to the fabric. These conditions are only found during a few months of the year so production is limited. After baking in the sun, the fabric is washed in the nearby river and then given a finish, which contains anthracite coal.
The finished fabric is two toned. One side usually has a black, glossy finish while the other side is colored. The coloring can be streaky, adding to its beauty. As the fabric is used, worn and washed it takes on a crinkly appearance. This characteristic is quite attractive as it allows the undertone or opposite side of the fabric to show through. Mud Silk lends itself well to reversible garments.
The process of making the fabric creates a crisp fabric with a slightly papery hand. It is suitable for jackets, pants, and loose fitting tops. Single layer and reversible garments are ideal. Bias bindings, Hong Kong and flat felled seam finishes allow the garment to be reversible.
The process of making Mud Silk had almost become obsolete during the Cultural Revolution, but luckily several designers with Asian roots have revived the fabric and its production continues. I designed Vogue V9217 with Mud Silk in mind. The sample garments for the pattern envelope were all sewn from Mud Silk.

Notions
Although most Mud Silk is lightweight and crisp, a thin layer of silt fills the weave of the fabric making it a challenge to sew at times. A very sharp Jeans needle in a size 70 is the best choice. The shaft of a Jeans needle is strong and the size 70 leaves the smallest hole possible in the fabric.

A straight stitch foot and straight stitch throat plate will give you the best stitch quality. I used a 1/4” foot #57 on my Bernina sewing machine and 100% all-purpose Gutermann thread for this project. I chose two colors, one to match each side of the fabric.
A 1/2” binding tip was used to fold the bias binding.

Fine glass head pins are best for Mud Silk. Because the fabric is so dense, pins or incorrectly placed stitching can leave holes in the fabric, so take your time and doublecheck your work before sewing.
Reversible Garments
 When planning a reversible garment, think of loose easy fitting styles. Seams need to be
finished so that they are attractive on both sides. Darts need to be stitched down. To keep the fabric lightweight and fluid, facings and hem allowances can be omitted. Edges can be finished instead with bias bindings.
Pattern
 Vogue 9217 is a perfect choice to try sewing with Mud Silk. This simple camisole tank top
is loose fitting, the edges are trimmed in bias bindings and there are no neck or armhole
facings. There is a dart but it is sewed down so it becomes very flat and unnoticeable on either side of the garment.
Techniques
Layout and Cutting
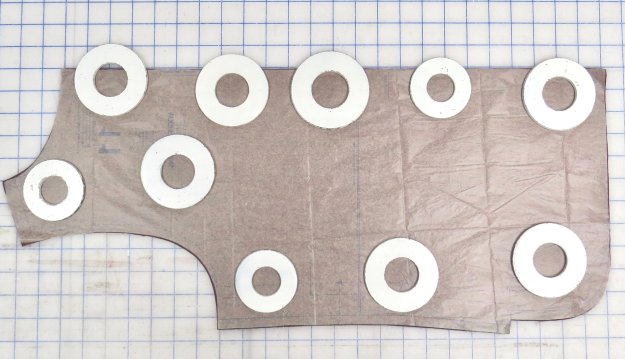
Mud Silk can be slightly streaky in appearance. Evaluate the fabric and decide where the
pattern pieces should be placed. The fabric can be cut on the fold as a double layer. I found it easiest to use weights and a sharp rotary cutter to cut through the dense fabric.
Cut strips of 1” bias to use as binding for the neck, armhole and hems. It’s best to make sure you have enough fabric to cut six individual strips, one for each armhole, one for each Front and Back hem, and one for each Front and Back neckline.

Darts
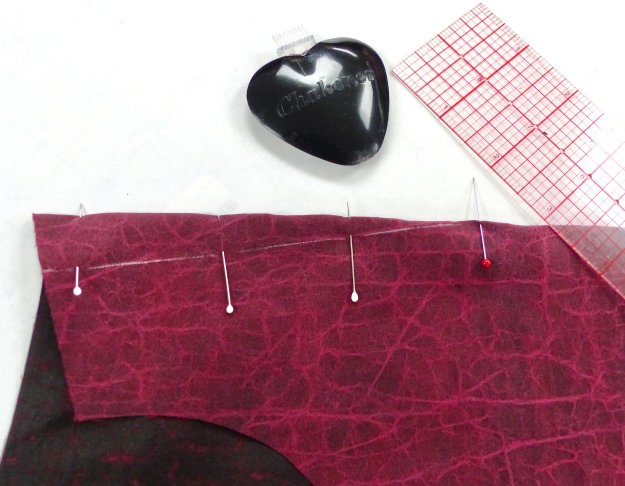
Chalk the dart stitching line.

Fold the dart in half. Insert pins on the stitching line aligning them with the chalk line on the underside. Too many pins placed beyond the stitching line may leave noticeable holes in the fabric.
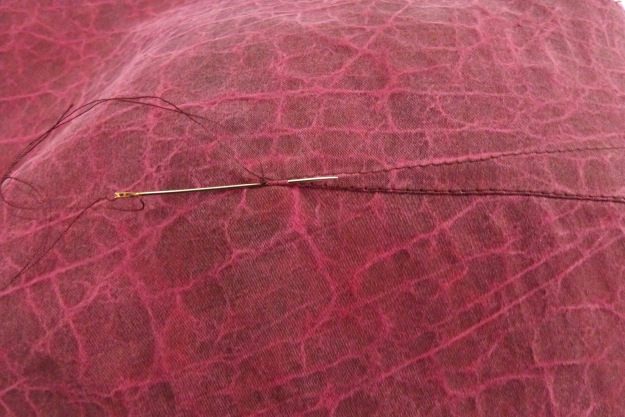
Sew the dart, leaving long thread tails at the tip. Knot the thread tails, thread them into a self-threading needle and then weave them through stitches on the lower dart leg for approximately 1/2” before cutting them off.
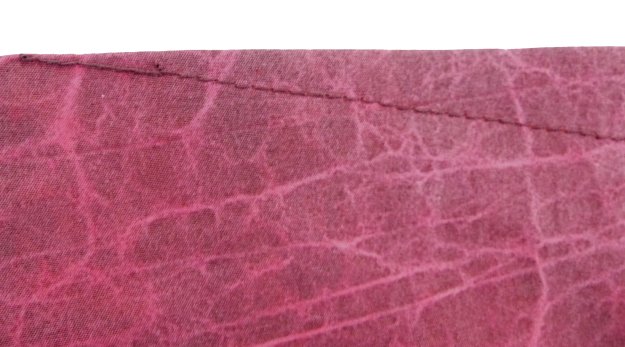
Press the dart downward over a tailor’s ham. The tip of the dart should be quite narrow. Do not press beyond the tip.

Edge stitch the lower edge of the dart leaving long thread tails at the tip.

Knot off the thread tails, thread them into a self threading needle and bury them in the tip. Pull on the thread tails and the knot will disappear into the needle hole.

Finished dart
Bias Binding
Use a 1/2” binding tip to fold the 1” bias strips.

(If you are lucky enough to have a Simplicity Bias machine, which folds the binding for you, it works very well for this. It is a discontinued item, however. The machine has a heated plate, which presses the tape as a roller pulls it through.)

Once pressed the folded bias tape will look like this:

Press the folded bias in half with one side slightly longer than the other.

The neck, armhole and hems all have bias binding attached to them prior to sewing the seams.
Open out the shorter side of the bias tape and place it right sides together with the garment. On one side of a reversible garment the tape will match the fabric and on the other it will show as a contrast. Using a straight stitch foot, stitch in the fold of the strip. Ease the tape around curves ensuring it does not get narrower. (I did not pin the tape but instead just placed it and held it with my fingers as I sewed.) Take your time!
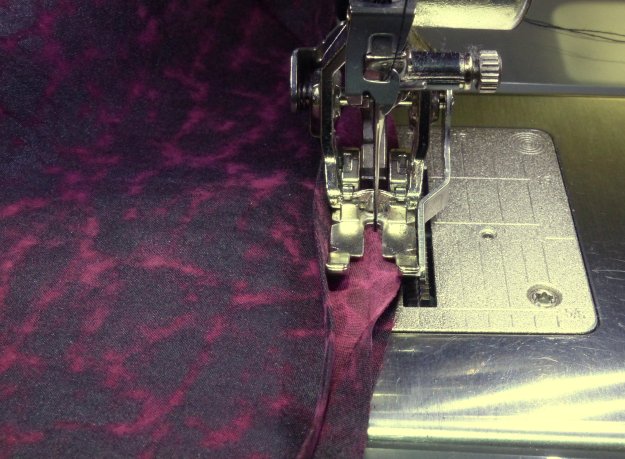
On the opposite side, the tape will look like this:
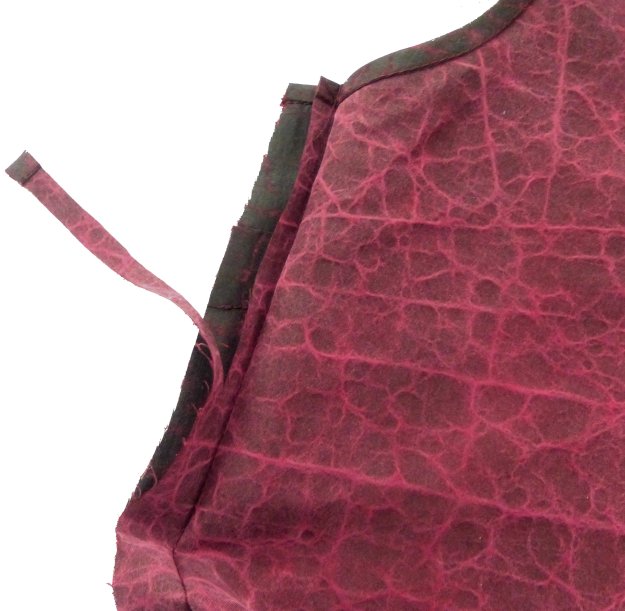
At the hem, stop stitching at the corner of the side seam extension. Fold the end of the tape back on itself. Wrap the tape around the seam allowance.

Stitch in the ditch catching the under side of the bias strip. I found I could feel the ridge of the folded edge and tell if I had folded it over enough to catch it in as I sewed. Press.


Finished hem binding.
Seams
Remember that the neck, armhole and hem edges are bound before the shoulder and side seams are sewn.
Here is a technique that is easy for making flat felled seams. On one side of the garment two rows of stitching will show while on the other side one row of stitching will show.

 Sew the seam with 5/8” seam allowance. Press the seam three times, flat, open and then towards one side. By pressing the seam open before pressing to one side you will get a very flat seam. Shoulder and side seams can press towards the Back of the garment.
Trim the Back seam allowance to 1/4”.
Wrap the Front seam allowance around the Back and press.
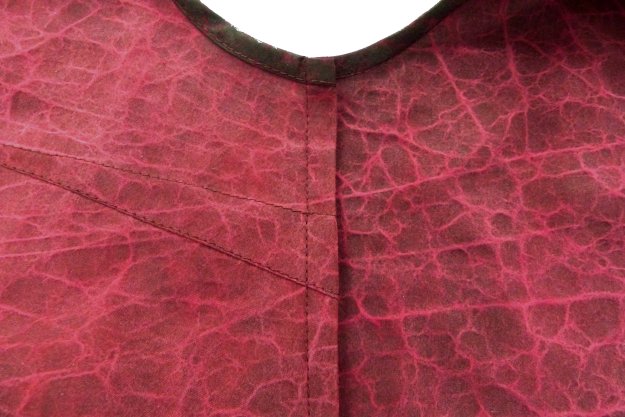
Pin seam allowance in place. Edge stitch.

Care
Mud Silk is relatively easy to care for. I recommend hand washing in cold water with a mild soap. Do not rub, wring or twist the fabric, which may damage the finish. Roll washed garments in a towel to remove excess water and hang to dry. Garments are best stored hung rather than folded to prevent permanent creases.


Great tutorial, I was not aware of mudsilk you peaked my interest and my wildside. Tks! Adironart
LikeLiked by 1 person
Kathryn Brenne is an inspiration, if ever there was one. :o) Someday I’m going to get me some of that mud silk. (I already have this pattern.) :o)
LikeLike
beautiful tutorial for a beautiful ensemble. thank you.
LikeLiked by 1 person
Wonderful article. I was wondering if Kathryn tried washing this fabric.
LikeLiked by 1 person
Hi Marcia, Please see the very end of the article where she talks about care of the fabric!
LikeLike
Thank you!
LikeLiked by 1 person
Are the pants made from the mud silk as well?
LikeLike
The Vogue pattern mentioned in this article has a pattern for pants, jacket and top, but I am not sure if Kathryn is wearing mud silk pants in the photos. Our focus was on the top for this introduction to working with mud silk, so if the pants are mud silk, it was something she did on her own, not for EOS.
LikeLike
Thank you for all the excellent tips. I definitely want to give this one a try in the new year! So beautiful.
LikeLiked by 1 person
Thank you, thank you! Wonderful tips for sewing with mud silk. How much yardage did you need for the top alone?
LikeLike
Hi Marilyn,
Here is Kathryn’s reply:
Depending on your size, the fabric requirements here https://voguepatterns.mccall.com/v9217 Allow for the bias bindings.
At 44” wide you would need between 1 7/8 and 2 1/4 yards. Having looked at my copy of the pattern I could squeeze my size, which is approximately a 12, out of 1 1/2 yards.
LikeLike